Warm Introduction
Chocolate and peanut butter are the ultimate dream team, aren’t they? Every time I bite into a decadent peanut butter cup, I’m transported back to my childhood, savoring that rich, nutty sweetness. But as an adult focused on fitness and high-protein eating, I wanted to recreate this indulgence without sacrificing my macros. That’s how these High-Protein Chocolate Peanut Butter Cups were born — a treat that tastes like dessert but fuels your muscles at the same time.
What makes this recipe truly special is how it combines rich chocolate flavor with creamy, protein-packed peanut butter. Each bite is indulgent, satisfying, and guilt-free — perfect for anyone who loves to snack smart. I first made these after a particularly grueling leg day, craving something sweet but needing protein to aid recovery. The result? A snack that tastes like dessert but supports my high-protein lifestyle.
These peanut butter cups are more than just a snack — they’re a little reminder that clean eating doesn’t have to be boring. Whether you’re prepping for a week of fitness meals or need a quick post-workout bite, these cups are your new go-to.
What Makes This Recipe Stand Out
High protein content: Unlike traditional peanut butter cups loaded with sugar and fat, this version uses whey or plant-based protein to give your muscles a boost. Each serving provides roughly 20g of protein, making it a great snack for recovery or a mid-day energy lift.
Balanced macros: This recipe balances protein, healthy fats, and natural sweeteners to keep you satisfied without spiking blood sugar.
Perfect for meal prep: These cups store beautifully in the fridge or freezer, making them an ideal snack for the week ahead.
Indulgent yet clean: You get the rich taste of chocolate and peanut butter without the processed junk. They feel like a treat but fit perfectly into a clean eating plan.
Personal Blogger Note
I’ll admit, I’ve had my fair share of failed protein dessert experiments — too dry, too chalky, or too sweet. But after a few tweaks, these High-Protein Chocolate Peanut Butter Cups became a weekly staple in my kitchen.
The first batch was a post-leg-day experiment. I remember mixing the protein-rich peanut butter filling, carefully layering it with chocolate, and thinking, “Will this really taste good?” The moment I took the first bite, I knew I had something special. It wasn’t just the flavor; it was the texture — creamy, firm, yet melt-in-your-mouth perfection.
I love making these for my clients and friends too. Watching them enjoy a snack that’s both healthy and decadent is incredibly rewarding. It’s proof that protein-packed snacks can be just as fun as indulgent desserts — sometimes even more satisfying because you’re nourishing your body while enjoying every bite.
Equipment Needed
- Mixing bowls: For blending peanut butter, protein powder, and sweeteners evenly.
- Measuring cups and spoons: Accuracy matters for both macros and texture.
- Mini muffin tin or silicone molds: Perfect for portion control and easy removal.
- Spatula or spoon: To evenly layer chocolate and peanut butter mixture.
- Microwave or double boiler: For melting chocolate without burning.
- Refrigerator or freezer: Essential for setting the cups quickly.
These tools make the process smoother, ensuring even layers, clean edges, and perfect texture in every cup.
Ingredients with Substitutions
Chocolate Layer
- ½ cup dark chocolate chips (or sugar-free chocolate for lower sugar)
- 1 tsp coconut oil (optional for smooth texture)
Peanut Butter Filling
- ½ cup natural peanut butter (substitute almond or cashew butter if desired)
- ¼ cup vanilla whey protein powder (or plant-based protein)
- 2–3 tbsp Greek yogurt (for creaminess, optional for vegan swap)
- 1–2 tbsp honey or maple syrup (adjust for sweetness)
Substitution Notes:
- Protein powder: Whey gives the creamiest texture; plant-based powders work but may slightly change flavor.
- Nut butter: Almond or cashew butter adds variety and slightly changes macros.
- Sweeteners: Use monk fruit or stevia for sugar-free versions; adjust based on sweetness preference.
- Chocolate: Dark chocolate supports antioxidants, while sugar-free chocolate keeps sugar low.
These swaps allow you to adjust protein, fat, and calories while maintaining the decadent flavor.
Step-by-Step Cooking Process
Step 1: Prepare Chocolate Base

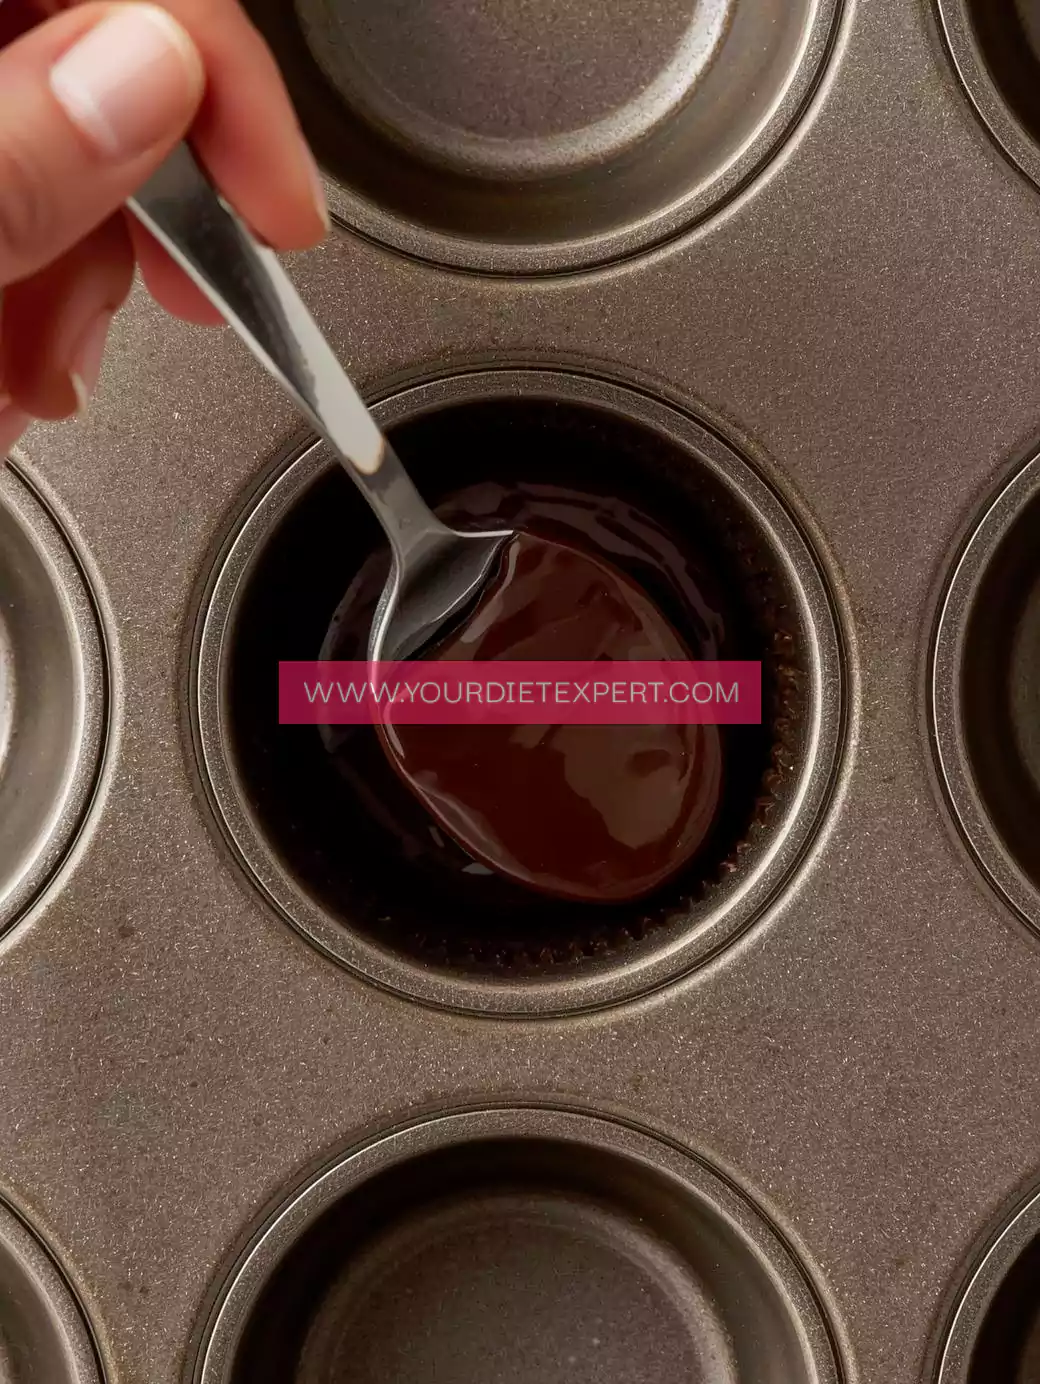
- Melt chocolate and coconut oil in a microwave-safe bowl, heating in 20-second intervals and stirring between each until smooth.
- Spoon a small layer of chocolate into each muffin tin or silicone mold. About 1 tsp per cup is enough.
- Freeze for 5–10 minutes to harden.
Step 2: Make Peanut Butter Filling
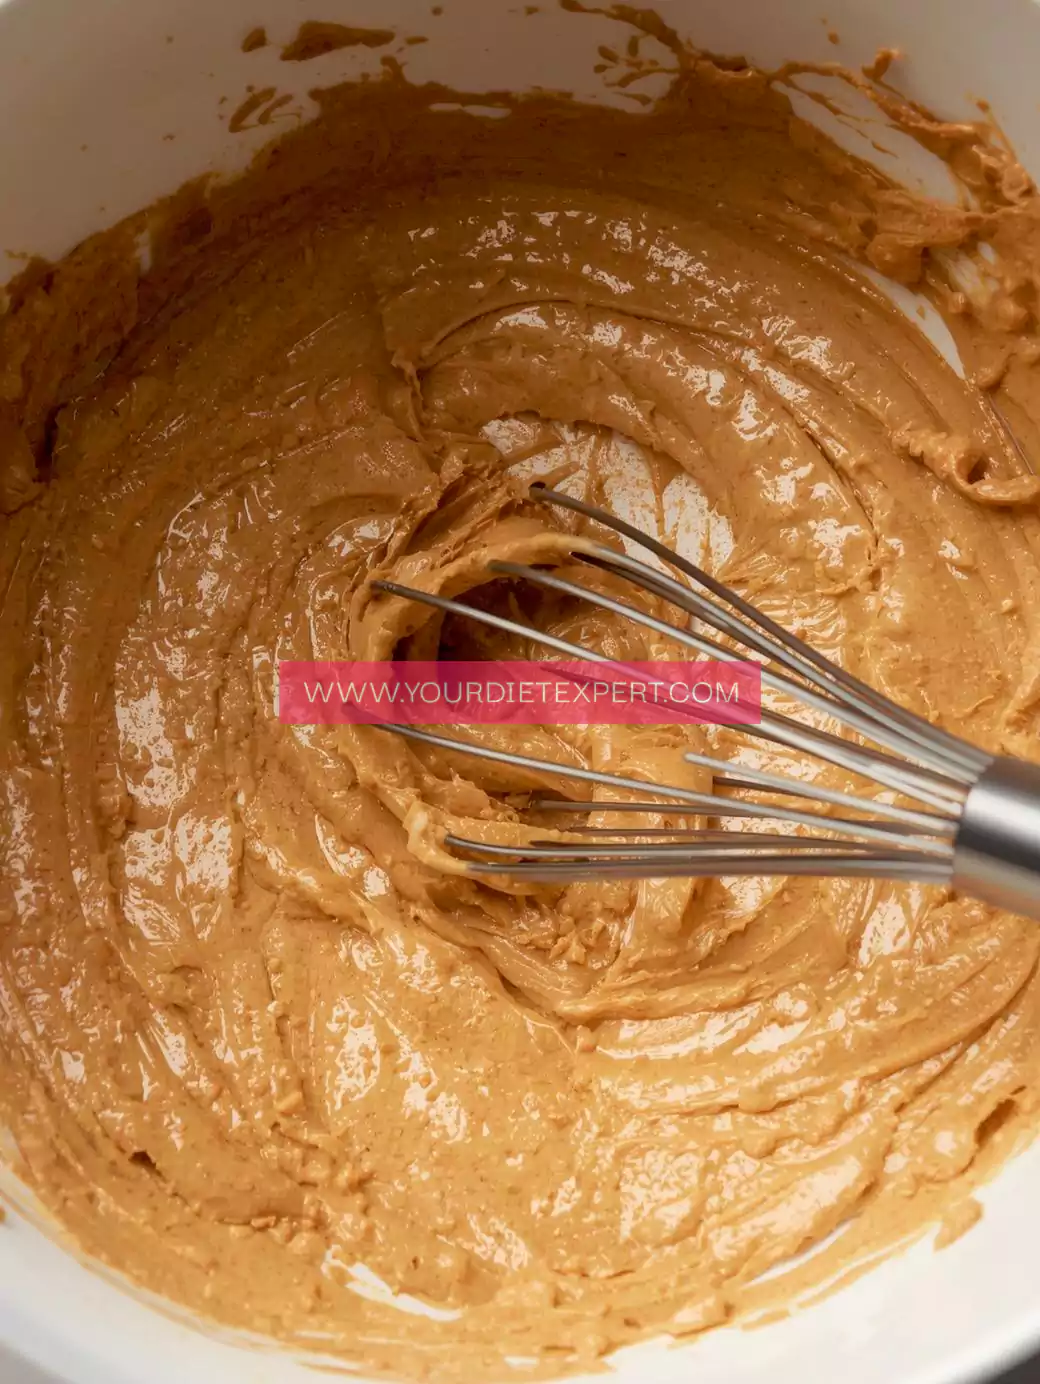
- Mix peanut butter, protein powder, Greek yogurt, and sweetener in a bowl until smooth.
- Adjust thickness: If too thick, add 1 tsp milk or water; if too thin, add a bit more protein powder.
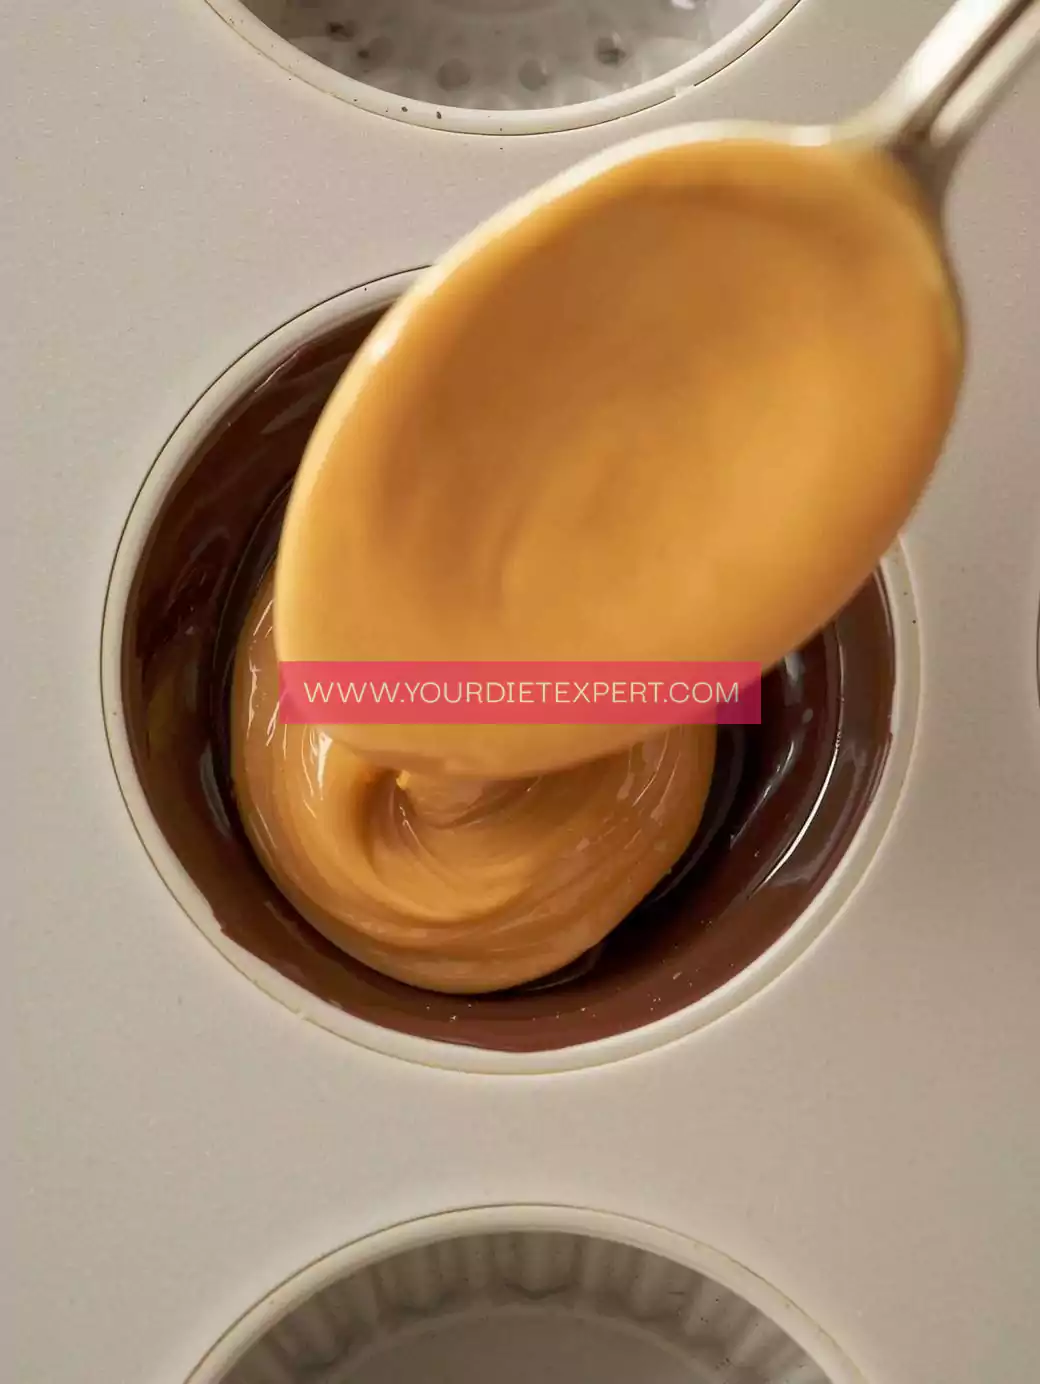
- Spoon the mixture over the set chocolate layer. Flatten gently with a spatula.
Step 3: Add Top Chocolate Layer
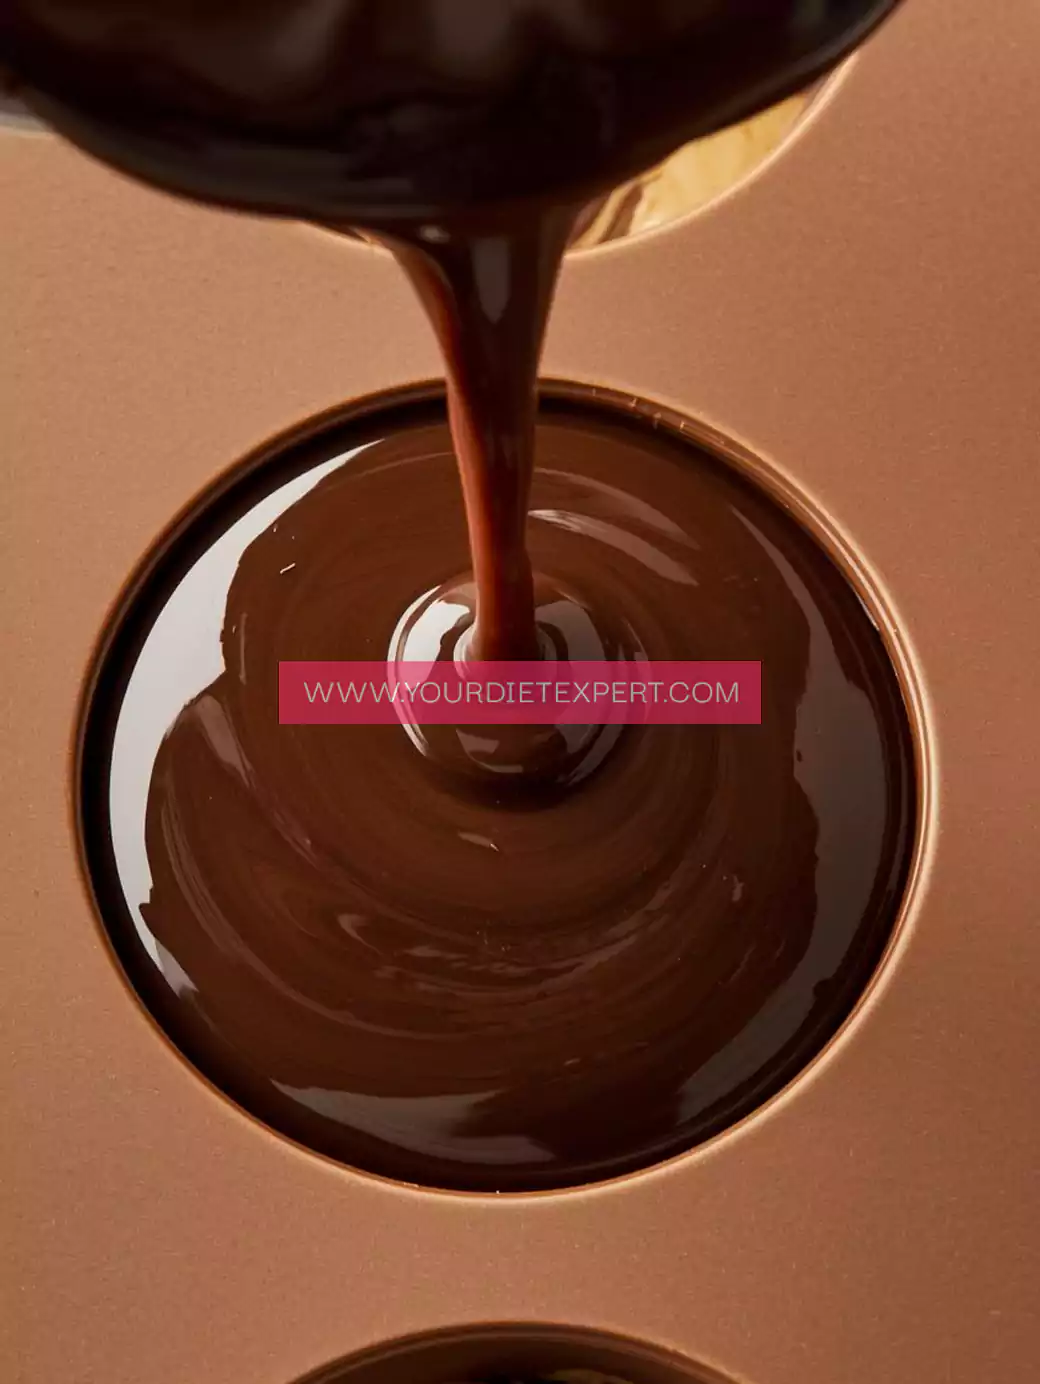
- Pour the remaining melted chocolate over the peanut butter layer, ensuring it covers entirely.
- Tap gently to remove air bubbles.
- Freeze for 20–30 minutes until fully set.
Step 4: Serve or Store
- Remove cups from molds.
- Store in an airtight container in the fridge (1 week) or freezer (up to 3 months).
Pro Tips:
- Don’t overheat chocolate; it can seize.
- Freeze for a short period first, then refrigerate to maintain smooth layers.
- For extra crunch, sprinkle crushed peanuts on top before chocolate sets.

Health & Nutrition Insights 💪
Muscle recovery: High protein supports muscle repair after workouts.
Satiety: Balanced macros keep you full, helping with appetite control.
Metabolism boost: Protein-rich snacks require more energy to digest, supporting metabolism.
Mood and energy: Peanut butter provides healthy fats and magnesium, aiding sustained energy and brain health.
High Protein Plan & Macro Insights 📊
Estimated per serving (1 peanut butter cup):
- Protein: 20g
- Carbs: 10g
- Fat: 12g
- Calories: ~230
Tips for meal plans:
- Post-workout snack for quick muscle recovery.
- Mid-morning energy boost.
- Macro-friendly dessert for clean eating or high-protein diet plans.
Portion control: Stick to 1–2 cups per serving to balance macros.
Serving + Pairing Ideas 🍽️
- Pair with fresh berries for antioxidants.
- Serve alongside coffee or protein shakes for breakfast.
- Pack in meal prep boxes for office snacks.
Storage & Meal Prep Tips 🧊
- Fridge: Airtight container, 7 days.
- Freezer: Layer parchment paper to prevent sticking, 3 months.
- Reheat: Not required; serve chilled.
FAQ Section ❓
Q: Can I make these dairy-free?
A: Yes! Use plant-based protein and yogurt alternatives.
Q: How much protein per serving?
A: Approximately 20g per cup.
Q: Can I prep for the week?
A: Absolutely! Store in fridge or freeze for longer storage.
Q: Can I use almond butter instead of peanut butter?
A: Yes, but flavor and texture will slightly differ.
Kitchen Tips & Troubleshooting Notes
- Chocolate seizing: Add coconut oil or a splash of milk.
- Layer separation: Ensure chocolate sets before adding filling.
- Texture adjustment: Protein powder absorbs moisture; tweak yogurt or milk quantity for smooth filling.
Nutrition Breakdown (Approximate)
- Calories: 230
- Protein: 20g
- Fat: 12g
- Carbs: 10g
- Fiber: 2g
Recipe Details
- Prep Time: 15 minutes
- Cook Time: 5 minutes (melting chocolate)
- Freeze Time: 30 minutes
- Total Time: 50 minutes
- Course: Snack / Dessert
- Cuisine: American / Fitness-friendly
- Servings: 8
- Calories: 230 per serving
Closing Note ❤️
These High-Protein Chocolate Peanut Butter Cups are my go-to snack for indulgence without guilt. They combine rich flavor, satisfying texture, and high protein content — keeping you on track with fitness goals while enjoying every bite. I hope they become a staple in your weekly meal prep too!
High-Protein Chocolate Peanut Butter Cups Recipe
Ingredients
Method
- Melt chocolate + coconut oil; layer molds; freeze 5–10 min.
- Mix peanut butter, protein powder, yogurt, sweetener; layer over chocolate.
- Pour remaining chocolate on top; freeze 20–30 min.
- Remove from molds; store in fridge/freezer.

Leave a Reply