Warm Introduction
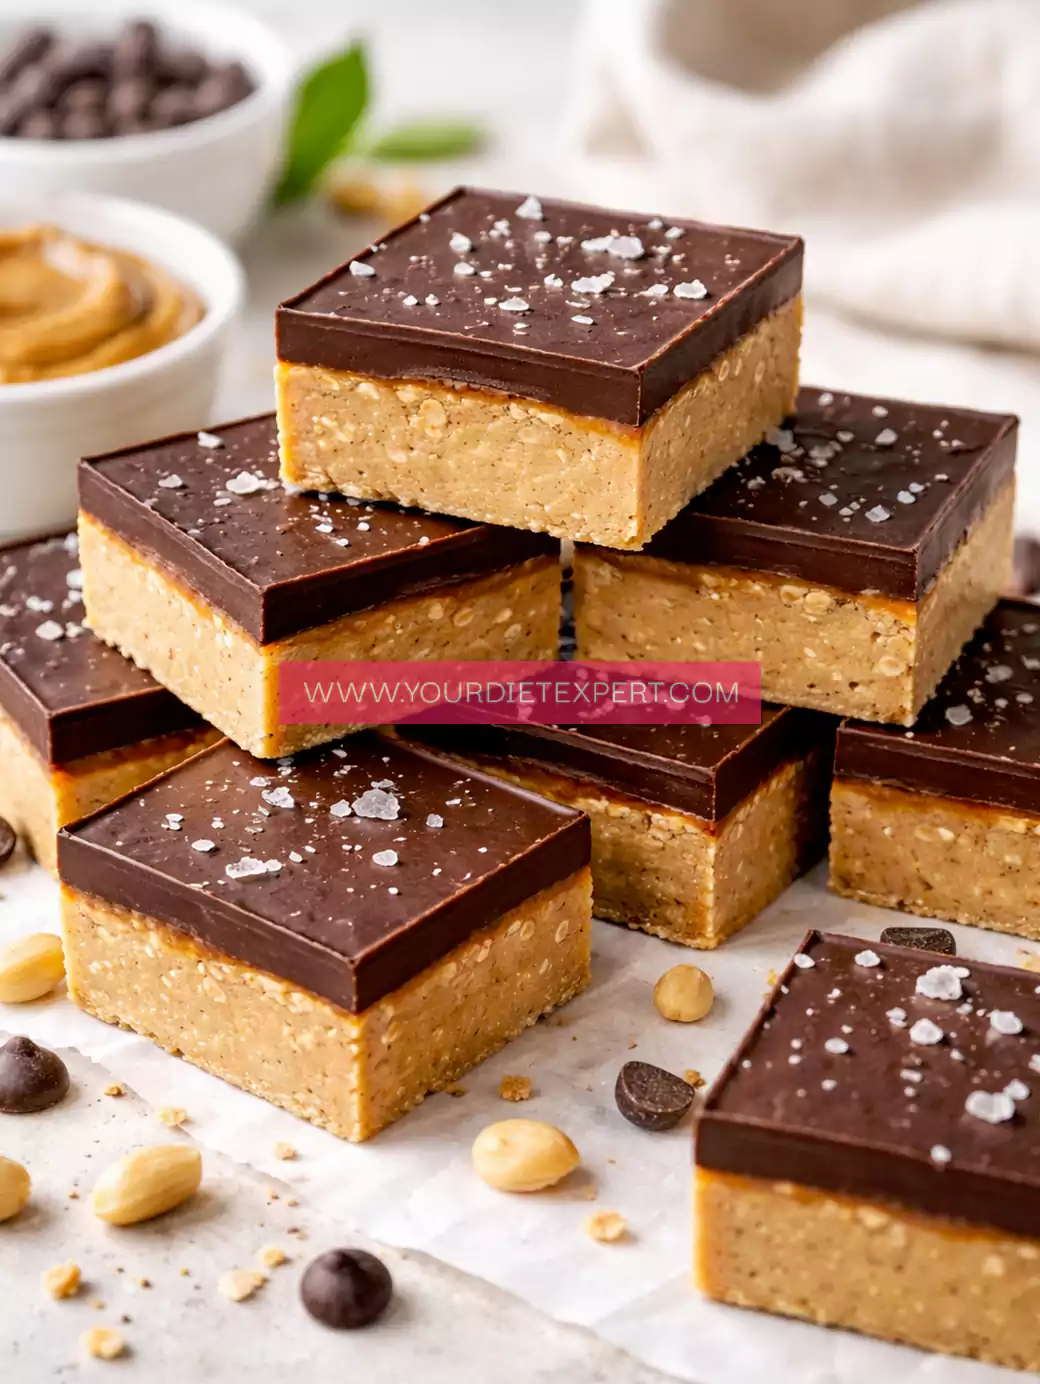
There’s something incredibly comforting about the combination of chocolate and peanut butter — rich, creamy, slightly sweet, and deeply satisfying. The first time I made these High-Protein No-Bake Chocolate Peanut Butter Bars (Healthy, Easy & Weight-Loss Friendly), it wasn’t just about creating a dessert. It was about finding a way to enjoy those classic flavors without stepping away from my goals.
I remember one evening after a long workout, when the craving hit hard. Not just hunger — but that specific craving for something indulgent. Something that felt like a treat. Instead of reaching for store-bought snacks packed with sugar and empty calories, I decided to create something better.
That’s how these bars came into my routine. They’re soft yet slightly firm, rich yet balanced, and most importantly — they feel like dessert but function like fuel. For anyone focused on fitness, weight loss, or clean eating, this recipe becomes more than just a snack. It becomes a smart, satisfying solution.
What Makes This Recipe Stand Out
This recipe isn’t just another healthy dessert — it’s a macro-friendly recipe designed for real-life consistency.
High Protein Content
Each bar is packed with protein from ingredients like peanut butter and protein powder. This makes it ideal for muscle recovery and sustained energy.
Balanced Macros
Unlike traditional desserts loaded with sugar and refined carbs, these bars provide a balance of protein, healthy fats, and controlled carbs.
Perfect for Meal Prep
These bars are incredibly easy to prepare in batches. You can make them once and have a ready-to-go snack for the entire week.
Indulgent Yet Clean
They taste like something you’d grab from a dessert shop, but they’re made with simple, clean ingredients that support your health goals.
Supports Active Lifestyles
Whether you’re following a high-protein dinner plan, trying to lose weight, or building muscle, these bars fit seamlessly into your routine.
Personal Blogger Note
I first made these bars during a phase where I was trying to stay consistent with my nutrition but still struggled with late-night cravings. I didn’t want to feel restricted — I wanted something that felt like a reward.
The first batch was good, but I knew it could be better. I adjusted the texture, balanced the sweetness, and worked on that perfect chocolate-to-peanut butter ratio. When I finally got it right, it felt like a breakthrough.
Now, these bars are always in my fridge. They’re my go-to when I need something quick, satisfying, and aligned with my goals. It’s a small reminder that healthy eating doesn’t mean giving up the foods you love — it just means reinventing them in a smarter way.
Equipment Needed
- Mixing Bowls – For separating layers and ensuring even mixing
- Spatula – Helps combine ingredients smoothly without overworking them
- Baking Dish or Tray – Used to shape and set the bars
- Parchment Paper – Prevents sticking and makes removal easy
- Measuring Cups/Spoons – Ensures accurate macro balance
These simple tools help maintain texture and consistency without complicating the process.
Ingredients with Substitutions
Base Layer:
- 1 cup natural peanut butter (protein + healthy fats)
- 1 scoop vanilla or chocolate protein powder
- 2 tbsp honey or sugar-free syrup
- ½ cup oat flour or almond flour
Chocolate Layer:
- ½ cup dark chocolate (melted)
- 1 tbsp coconut oil
Smart Substitutions
- Almond butter instead of peanut butter: slightly lighter flavor
- Plant-based protein powder: works well but may change texture
- Coconut flour: lower carb but denser
- Sugar-free chocolate: reduces sugar further
Each substitution allows flexibility while maintaining the structure.
Step-by-Step Cooking Process
Preparing the Base
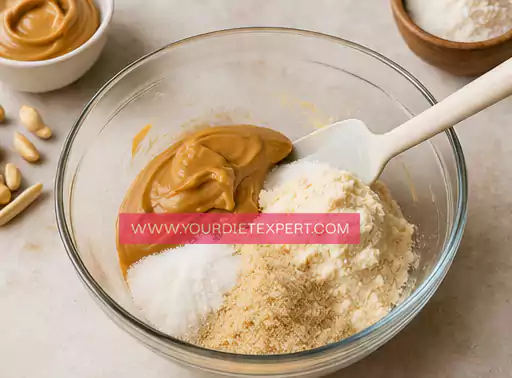
In a bowl, combine peanut butter, protein powder, sweetener, and flour. Mix until a thick dough forms.
Tip: Adjust consistency with a splash of milk if too thick.
Pressing the Base
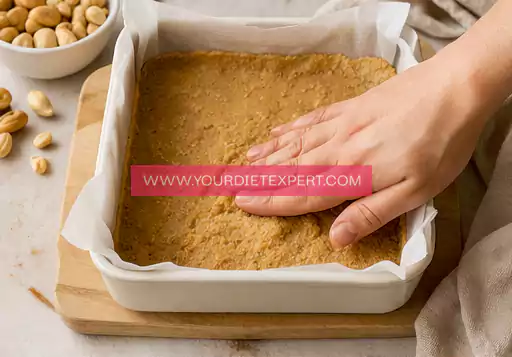
Transfer the mixture into a lined dish and press evenly to form a compact layer.
Preparing the Chocolate Layer
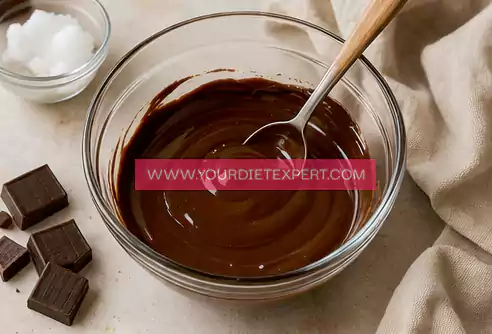
Melt dark chocolate with coconut oil until smooth.
Assembling the Bars
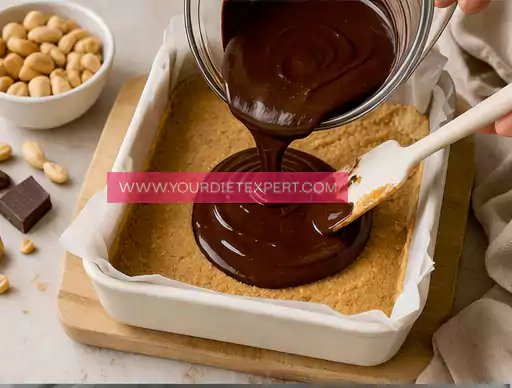
Pour the melted chocolate over the base and spread evenly.
Setting the Bars
Refrigerate for 1–2 hours until firm.
Slicing & Serving
Cut into bars and serve chilled.
Health & Nutrition Insights 💪
Protein plays a crucial role in muscle repair and recovery. These bars provide a convenient way to increase protein intake without relying on shakes.
They also help control hunger by promoting satiety. This makes them especially useful for weight loss or calorie control.
Healthy fats from peanut butter support hormone balance, while controlled sugar levels help maintain stable energy.
High Protein Plan & Macro Insights 📊
Estimated Macros (per bar):
- Protein: 12–18g
- Carbs: 8–12g
- Fats: 10–12g
How to Use:
- Post-workout snack: supports recovery
- Midday snack: prevents energy crashes
- Cutting phase: controls cravings
This is a powerful high-protein snack option.
Serving + Pairing Ideas 🍽️
- Serve with coffee or tea
- Pair with Greek yogurt
- Add berries for freshness
Perfect for:
- Snack time
- Meal prep
- Healthy dessert
Storage & Meal Prep Tips 🧊
- Store in fridge for up to 1 week
- Freeze for longer storage
- Keep in airtight container
FAQ Section ❓
Can I make this dairy-free?
Yes, use plant-based protein and dairy-free chocolate.
How much protein per bar?
Around 12–18g depending on ingredients.
Can I use whey protein?
Yes, it works well and gives a smoother texture.
Can I prep in bulk?
Absolutely, it’s ideal for batch preparation.
Kitchen Tips & Troubleshooting Notes
- If mixture is too dry, add a bit of milk
- If too soft, add more flour
- Chill fully before slicing
- Use a sharp knife for clean cuts
Nutrition Breakdown (Per Serving)
- Calories: ~220
- Protein: 15g
- Fat: 11g
- Carbs: 10g
- Fiber: 2g
Recipe Details
- Prep Time: 10 minutes
- Cook Time: 0 minutes
- Total Time: 2 hours (chilling)
- Course: Dessert / Snack
- Cuisine: Healthy
- Servings: 8
- Calories: ~220
Closing Note ❤️
These bars have become a staple in my routine — simple, satisfying, and perfectly aligned with a healthy lifestyle. They prove that you don’t have to give up chocolate or peanut butter to stay on track.

High-Protein No-Bake Chocolate Peanut Butter Bars Recipe
Ingredients
Method
- Add the peanut butter into a mixing bowl and give it a gentle stir first. This helps soften it slightly, making it easier to combine with the other ingredients and ensuring a smoother final texture.
- Add the protein powder, honey, and oat flour into the bowl. Start mixing slowly with a spatula or spoon, then continue until everything comes together into a thick, dough-like mixture. Make sure there are no dry patches of flour or clumps of protein powder left.
- Prepare a baking dish by lining it with parchment paper. Transfer the mixture into the dish and begin pressing it down firmly using the back of a spoon or your hands. Take your time to spread it evenly across the base and smooth the surface for a neat, compact layer.
- In a separate bowl, melt the dark chocolate together with the coconut oil. You can do this in short intervals in the microwave or over a double boiler, stirring in between until the mixture becomes fully smooth, glossy, and lump-free.
- Carefully pour the melted chocolate over the prepared base. Use a spatula to spread it evenly across the entire surface, making sure it reaches the corners and forms a clean, even top layer.
- Place the dish into the refrigerator and let it chill for at least 1–2 hours. This allows both layers to firm up properly and gives the bars their perfect sliceable texture.
- Once fully set, remove the dish from the fridge and lift the slab out using the parchment paper. Place it on a flat surface and use a sharp knife to cut it into evenly sized bars or squares.
- Serve the bars chilled for the best texture and flavor. The base will be soft yet firm, while the chocolate layer will have a slight snap, creating the perfect balance in every bite.

Leave a Reply