Warm Introduction
The first time I ever cracked through a crème brûlée’s caramelized top, I remember being completely mesmerized by that sound — a soft, delicate crack that felt almost ceremonial. It wasn’t just dessert; it was an experience. Growing up, crème brûlée was always something reserved for special occasions, restaurant menus, or moments when you wanted to impress. It never felt like something you could casually make at home, let alone enjoy on a keto or low-carb lifestyle.
That’s exactly why this Keto Crème Brûlée (Sugar-Free, Low-Carb & Creamy) holds such a special place in my kitchen. It brings that same elegance, richness, and indulgent satisfaction — but without the sugar crash, carb overload, or post-dessert regret. Every spoonful is silky, gently sweet, and deeply comforting, proving that keto desserts don’t have to feel like compromises.
If you’re following a keto, low-carb, or blood-sugar-friendly lifestyle, this recipe feels like reclaiming something you thought you had to give up forever. It’s classic, familiar, and deeply satisfying — yet completely aligned with healthy eating goals. And once you realize how simple it is to make, it quickly becomes one of those recipes you return to again and again.
What Makes This Keto Crème Brûlée Recipe Stand Out
There are plenty of sugar-free desserts out there, but very few that truly feel authentic. This keto crème brûlée doesn’t rely on shortcuts that change the texture or flavor. Instead, it respects the structure of the classic dessert while thoughtfully adapting it for a low-carb lifestyle.
First, the texture is exactly what you expect from a proper crème brûlée. It’s creamy, custard-like, and smooth enough to melt on your tongue. There’s no graininess, no artificial aftertaste, and no rubbery finish — problems that often plague low-carb custards. The balance between fat, egg yolks, and cream is intentional, ensuring the custard sets beautifully without becoming dense.
Second, this recipe is naturally keto-friendly without trying to be overly “diet-y.” It’s rich in healthy fats, moderate in protein, and extremely low in net carbs, making it suitable not just for keto followers but also for diabetics and anyone focused on blood-sugar control. The sweetness is gentle and controlled, allowing the vanilla and cream to shine rather than overpowering the palate.
Lastly, this recipe fits beautifully into real life. It feels luxurious enough for dinner parties or date nights, yet simple enough to make on a quiet weekend when you just want something comforting. It’s proof that low-carb desserts can still feel elegant, nostalgic, and deeply satisfying.
Personal Blogger Note
I still remember the first time I tested this recipe in my own kitchen. It was one of those evenings when I wanted something sweet but didn’t want to derail a full week of disciplined eating. I wasn’t craving chocolate or something heavy — I wanted something calm, creamy, and comforting. That’s when crème brûlée popped into my mind, almost teasingly.
I’ll admit, I was skeptical at first. Custards can be unforgiving, and the idea of making one without sugar felt risky. But once I pulled the ramekins out of the oven and saw how beautifully they set, I knew I was onto something. The real moment of truth came when I cracked through the chilled top and took that first spoonful — smooth, rich, and surprisingly authentic.
Since then, this keto crème brûlée has become my go-to dessert for moments when I want something refined without feeling heavy. I’ve served it to friends who aren’t keto at all, and not once has anyone guessed it was sugar-free. That, to me, is the ultimate test of a successful healthy dessert.
Equipment You’ll Need (And Why It Matters)
Making a great crème brûlée isn’t about fancy tools — it’s about using the right basics correctly. Each piece of equipment plays a role in achieving that signature silky texture.
A mixing bowl is essential for combining the egg yolks and sweetener smoothly. I prefer one with enough space to whisk comfortably without splashing, which makes the process calmer and more controlled.
A whisk is important for gently blending the custard without incorporating too much air. Over-whisking can introduce bubbles that affect the final texture, so a steady, relaxed motion works best here.
A saucepan is used to gently heat the cream. This step infuses warmth and helps dissolve the sweetener evenly, creating a smooth base without scorching the cream.
You’ll also need ramekins, which are traditional for crème brûlée. Their shallow depth allows the custard to cook evenly and set properly. Using similar-sized ramekins ensures consistent baking across all servings.
Finally, a baking dish large enough to hold the ramekins is needed for the water bath. This gentle cooking method prevents curdling and ensures the custard stays silky rather than scrambled.
Ingredients With Exact Measurements & Smart Substitutions
Every ingredient in this keto crème brûlée serves a specific purpose. Understanding why each one matters helps ensure consistent results every time.
Heavy cream – 2 cups (480 ml)
This forms the foundation of the custard. Heavy cream provides richness, structure, and that signature mouthfeel. Avoid lighter creams, as they won’t set properly.
Egg yolks – 5 large
Egg yolks thicken the custard and give it its luxurious texture. Using only yolks keeps the dessert smooth and prevents an eggy taste.
Powdered keto sweetener – ⅓ cup
Powdered sweetener dissolves more easily than granulated versions, preventing graininess. It sweetens without affecting blood sugar.
Pure vanilla extract – 1 tablespoon
Vanilla is the soul of crème brûlée. It adds warmth and depth, balancing the richness of the cream.
Pinch of salt
A small amount of salt enhances sweetness and rounds out the flavors without making the dessert salty.
For the topping (optional but classic): powdered keto sweetener – 2 tablespoons
This creates the signature caramelized top. While optional, it adds texture contrast and that iconic crack when tapped.
Substitutions are possible if needed. Coconut cream can replace heavy cream for a dairy-free version, though the flavor will be slightly different. Vanilla bean paste can be used instead of extract for a more intense vanilla profile.
Step-by-Step Cooking Process
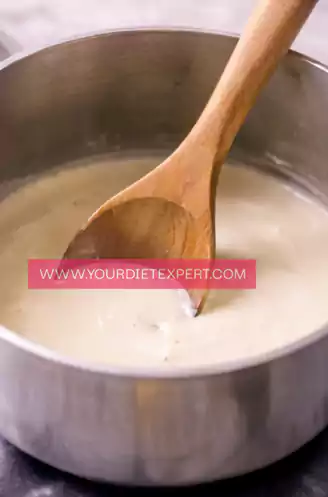
Step 1: Heating the Cream Gently
Begin by pouring the heavy cream into a saucepan and placing it over medium-low heat. Warm it slowly, stirring occasionally, until it’s hot but not boiling. You should see gentle steam rising — this is your cue to remove it from the heat. Boiling can cause separation, so patience here pays off.
Step 2: Whisking the Egg Yolks and Sweetener
In a mixing bowl, whisk the egg yolks and powdered sweetener together until the mixture lightens slightly in color. This step ensures the sweetener dissolves fully and helps prevent grainy custard later.

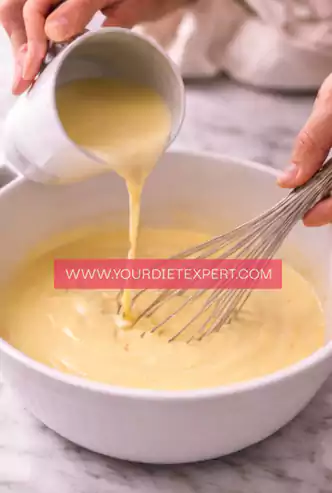
Step 3: Tempering the Eggs
Slowly pour the warm cream into the egg mixture while whisking continuously. This gradual process gently raises the temperature of the eggs without scrambling them. Take your time — slow and steady creates the smoothest custard.
Step 4: Adding Flavor
Once fully combined, whisk in the vanilla extract and a pinch of salt. At this stage, the custard should look silky, pale, and uniform, with no visible bubbles or streaks.
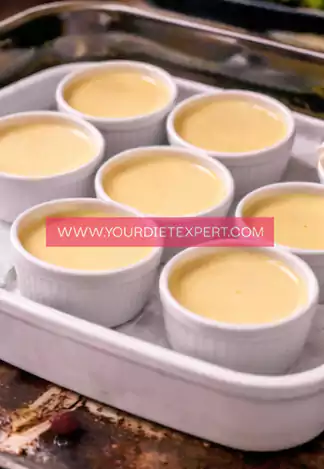
Step 5: Preparing the Water Bath
Preheat your oven to 325°F (165°C). Place your ramekins inside a deep baking dish, making sure they aren’t touching each other. Carefully pour the custard mixture into each ramekin, filling them almost to the top. The custard should look smooth and glossy.
Next, carefully pour hot water into the baking dish until it reaches about halfway up the sides of the ramekins. This water bath is one of the most important steps in making a perfect crème brûlée. It allows the custard to cook gently and evenly, preventing curdling or a rubbery texture.
Step 6: Baking Until Just Set
Transfer the baking dish carefully into the oven. Bake until the custards are set around the edges but still slightly jiggly in the center when gently shaken. This usually takes about 40–45 minutes, depending on your oven and ramekin size.
Avoid overbaking. The custard will continue to firm up as it cools, and a slight wobble in the center is exactly what you want for that classic creamy texture.
Step 7: Cooling and Chilling
Remove the baking dish from the oven and carefully lift the ramekins out of the hot water. Let them cool at room temperature for about 30 minutes, then transfer them to the refrigerator. Chill for at least 3–4 hours, or preferably overnight. This resting time allows the custard to fully set and the flavors to deepen.
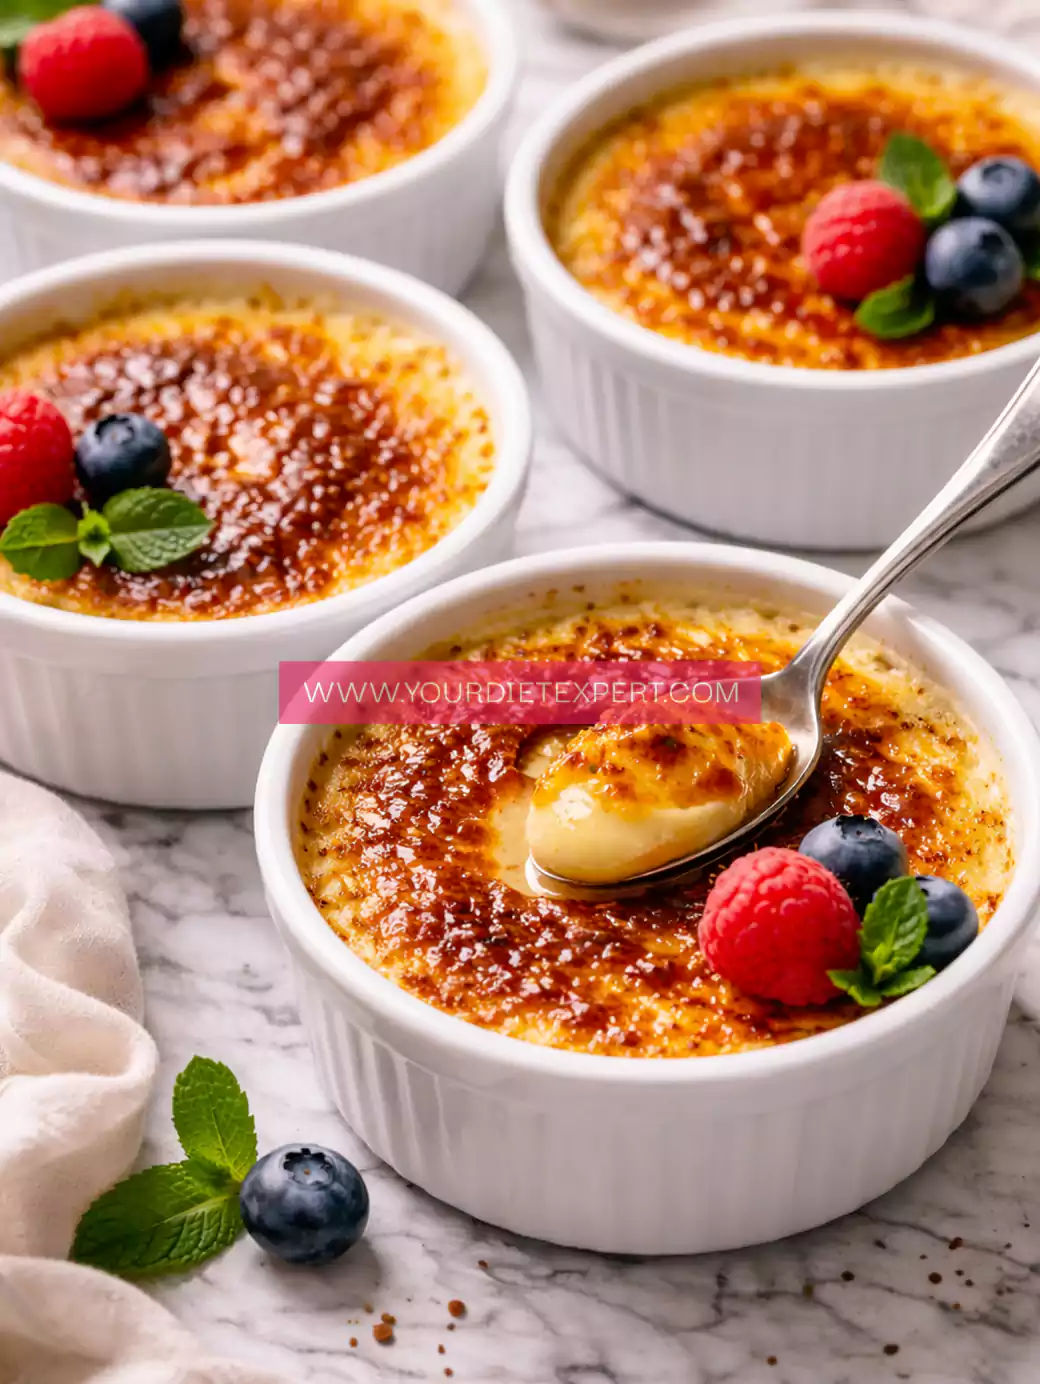
Step 8: Creating the Brûlée Topping
Just before serving, sprinkle a thin, even layer of powdered keto sweetener over the top of each chilled custard. Using a kitchen torch, carefully caramelize the sweetener until it melts and forms a golden, glass-like crust. Allow the topping to cool for a minute so it hardens before serving.
Health & Nutrition Insights
This Keto Crème Brûlée (Sugar-Free, Low-Carb & Creamy) is more than just a dessert — it’s a smart indulgence. Because it’s rich in healthy fats and extremely low in net carbs, it supports ketosis while still satisfying sweet cravings.
The high fat content helps keep you full and satisfied, reducing the urge to snack later. Without refined sugar, this dessert avoids blood sugar spikes, making it suitable for diabetics and anyone focused on metabolic health.
Egg yolks provide essential nutrients like choline and fat-soluble vitamins, while heavy cream contributes satiety and richness without unnecessary carbs. This is a dessert that aligns with keto principles rather than working against them.
Serving & Pairing Ideas
This keto crème brûlée is elegant enough to stand alone, but it also pairs beautifully with simple additions. A few fresh berries on the side can add color and contrast without significantly increasing carbs. For special occasions, serve it alongside a cup of unsweetened espresso or black coffee to balance the richness.
It’s perfect for dinner parties, holiday meals, or when you want to end a meal on a calm, satisfying note rather than something heavy or overly sweet.
Storage & Meal Prep Tips
Once set, crème brûlée stores beautifully. Keep the custards covered in the refrigerator for up to 3 days. Do not add the caramelized topping until just before serving — this ensures the crust stays crisp rather than dissolving into the custard.
This makes it an excellent make-ahead dessert. Prepare everything in advance, chill, and brûlée the tops right before serving for stress-free entertaining.
Frequently Asked Questions
Can I make this dairy-free?
Yes, full-fat coconut cream can be used in place of heavy cream. The flavor will have a subtle coconut note, but the texture remains rich and creamy.
Why is my custard grainy?
Graininess usually comes from overheating or overbaking. Always cook gently and remove the custard while the center is still slightly jiggly.
Can I skip the brûlée topping?
Absolutely. The custard itself is delicious even without the caramelized top, especially if you prefer a softer texture.
Can I freeze keto crème brûlée?
Freezing is not recommended, as it alters the texture and can cause separation once thawed.
Kitchen Tips & Troubleshooting
• Always strain the custard before pouring if you see bubbles or streaks
• Bake low and slow for best texture
• Chill thoroughly before torching
• Use powdered sweetener for the smoothest custard and topping
Nutrition Breakdown (Per Serving)
Calories: ~360
Protein: ~6g
Fat: ~36g
Total Carbs: ~3g
Net Carbs: ~2g
Recipe Details
Prep Time: 15 minutes
Cook Time: 45 minutes
Total Time: 1 hour + chilling
Course: Dessert
Cuisine: French
Servings: 4
Calories: ~360 per serving
This keto crème brûlée is proof that classic desserts don’t have to disappear when you choose a low-carb lifestyle. With its silky custard and crisp caramelized top, it delivers comfort, elegance, and satisfaction in every spoonful. It’s the kind of dessert that feels special without feeling heavy — exactly how a great treat should end a meal.
Keto Crème Brûlée Recipe
Ingredients
Method
- Pour the heavy cream into a saucepan and place it over medium-low heat. Warm it slowly, stirring occasionally, until you see gentle steam rising from the surface. Do not let it boil. Once it’s hot but calm, remove it from the heat immediately. This gentle warming prevents the cream from separating and keeps the final custard smooth.
- In a mixing bowl, whisk the egg yolks and powdered sweetener together until the mixture looks smooth and slightly lighter in color. This step helps dissolve the sweetener fully and creates a silky base that won’t turn grainy after baking.
- While whisking continuously, slowly pour the warm cream into the egg mixture in a thin stream. Take your time with this step. The slow pour gently raises the temperature of the eggs without scrambling them, which is key to achieving a creamy, custard-like texture.
- Once the cream and eggs are fully combined, whisk in the vanilla extract and a small pinch of salt. The mixture should now look pale, glossy, and completely uniform, with no visible streaks or bubbles.
- Carefully pour the custard into individual ramekins, filling them almost to the top. Place the filled ramekins into a deep baking dish, making sure they are spaced evenly and not touching each other.
- Slowly pour hot water into the baking dish until it reaches about halfway up the sides of the ramekins. This water bath helps the custard cook gently and evenly, preventing curdling and ensuring a smooth final texture.
- Transfer the baking dish to a preheated oven set at 325°F (165°C). Bake until the custards are set around the edges but still slightly jiggly in the center when gently shaken. This usually takes about 40–45 minutes, depending on your oven and ramekin size.
- Remove the baking dish from the oven and carefully lift the ramekins out of the hot water. Let them cool at room temperature for about 30 minutes, then transfer them to the refrigerator and chill for at least 3–4 hours, or until fully set.
- Just before serving, sprinkle a thin, even layer of powdered sweetener over the top of each chilled custard. Use a kitchen torch to carefully caramelize the sweetener until it melts and forms a golden, glass-like crust. Allow it to cool for a minute so the topping hardens, then serve and enjoy.

Leave a Reply