Warm Introduction
The first time I made these Keto Crispy Garlic Mushroom Bites, it wasn’t for a party or a special occasion. It was one of those quiet evenings when dinner was done, the kitchen was still warm, and I wanted something crunchy — not a full meal, not dessert, just a satisfying bite that felt indulgent without knocking me out of ketosis. You know that feeling when you want to snack, but also want to feel good about it afterward? That’s exactly where this recipe was born.
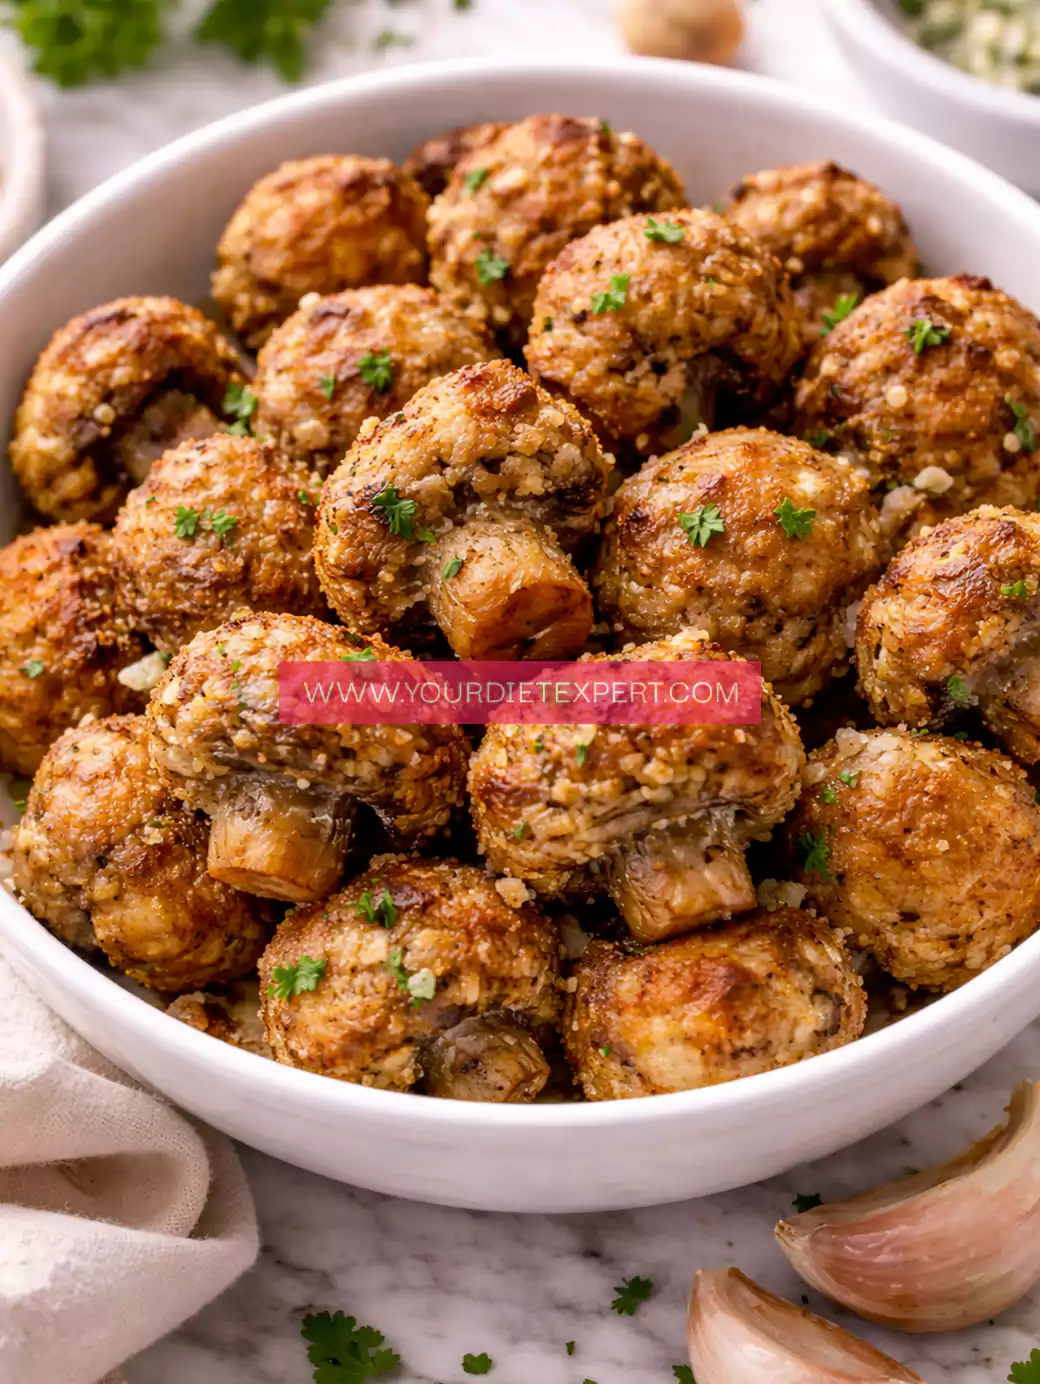
Mushrooms have always been a comfort ingredient for me. They soak up flavor beautifully, turn almost meaty when cooked right, and somehow feel hearty even without carbs. When paired with garlic and crisped just right, they become something far more exciting than a side dish. These mushroom bites hit that rare sweet spot: crispy on the outside, juicy on the inside, deeply savory, and completely low-carb.
If you follow a keto or low-carb lifestyle, you already know that appetizers and snacks can be the hardest part. Chips, crackers, breaded bites — they’re everywhere. These Keto Crispy Garlic Mushroom Bites exist to fill that gap. They’re crunchy, flavorful, and genuinely satisfying, whether you’re serving them to guests or eating them straight off the pan while standing at the counter.
What Makes These Keto Crispy Garlic Mushroom Bites Stand Out
Most low-carb mushroom recipes focus on sautéing or roasting, which is great — but this one is different. These bites are designed to be crispy, not soggy, not limp, not “almost crunchy.” The coating is light but intentional, allowing the mushrooms to crisp without overpowering their natural flavor.
Another thing that sets this recipe apart is balance. Garlic is bold, but not sharp. The seasoning enhances the earthiness of the mushrooms instead of masking it. And because we’re not using traditional breadcrumbs, the mushrooms stay lighter and easier to digest while still delivering that crave-worthy texture.
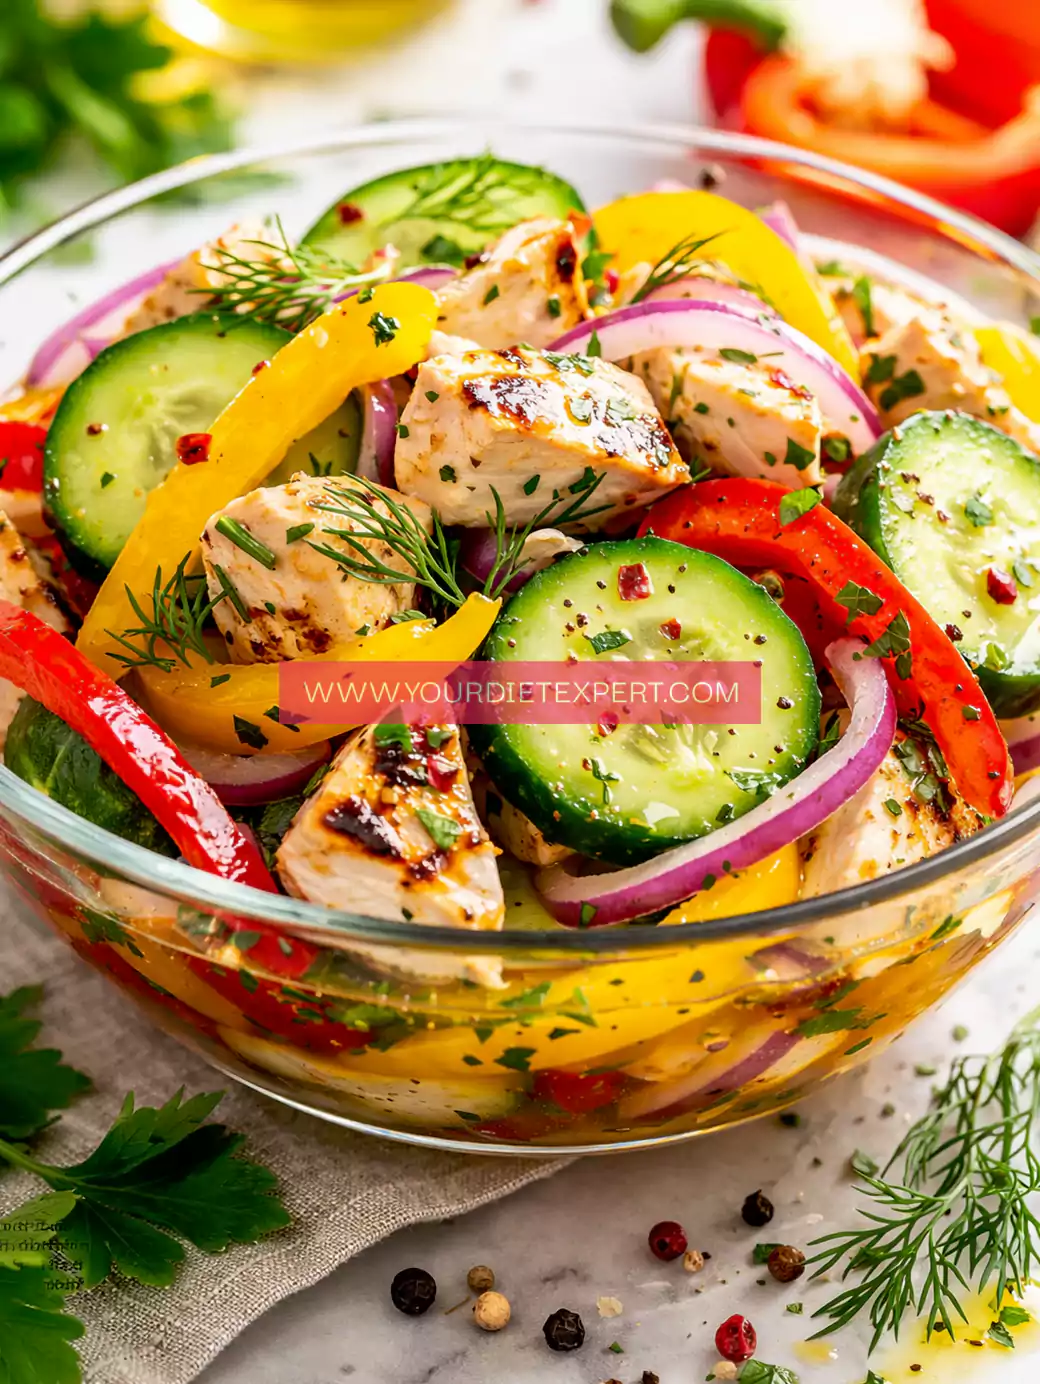
They’re also incredibly versatile. Serve them as a keto appetizer, a party snack, a side dish, or even toss them onto a salad for extra crunch. Few low-carb recipes can move between roles this easily — and still feel special every time.
Personal Blogger Note
I’ve tested versions of this recipe more times than I can count. Too much coating, and the mushrooms lost their identity. Too little, and they didn’t crisp properly. At one point, I even tried rushing the process — and that’s when I learned that mushrooms punish impatience. Moisture matters. Heat matters. Space on the pan matters.
The version you’re getting here is the one I come back to again and again. It’s the one I make when friends come over and don’t even realize they’re eating keto. It’s the one I reach for when I want something crunchy late in the evening but don’t want to undo a good day of eating.
Every time I pull these out of the oven or pan, the garlic aroma fills the kitchen, and I’m reminded why simple ingredients done right always win.
Kitchen Equipment You’ll Need (And Why It Matters)
A large mixing bowl is essential here. Mushrooms need space when being coated so they’re evenly seasoned without being crushed or bruised.
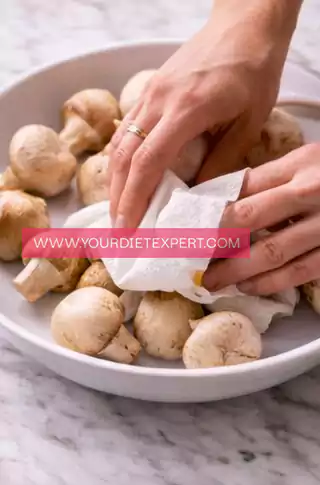
A clean kitchen towel or paper towels help remove excess moisture from the mushrooms — one of the most important steps for crispiness that people often skip.
A wide baking sheet or skillet ensures the mushrooms cook in a single layer. Crowding causes steaming, and steaming is the enemy of crisp texture.
A spatula or tongs allow gentle flipping without tearing the mushrooms or knocking off the coating.
None of this equipment is fancy — it’s just practical, reliable, and tested through real cooking, not theory.
Ingredients With Substitutions (Exact Measurements)
Mushrooms (16 oz / 450 g, cleaned and dried)
Button mushrooms or cremini mushrooms work best. Cremini have slightly deeper flavor, but both crisp beautifully. Avoid very large mushrooms unless cut evenly.
Almond Flour (½ cup)
This replaces traditional breadcrumbs and keeps the recipe keto-friendly. It creates a light coating without heaviness. Coconut flour is not recommended here — it absorbs too much moisture.
Grated Parmesan Cheese (½ cup)
Adds saltiness and helps the coating crisp. Nutritional yeast can be used for a dairy-free option, but the texture will be slightly different.
Garlic Powder (1 teaspoon)
Provides even garlic flavor throughout. Fresh garlic alone can burn, which is why this recipe balances both forms.
Fresh Garlic, minced (2 cloves)
Adds aromatic depth and that unmistakable garlic bite.
Egg (1 large)
Acts as the binder that helps the coating stick without becoming thick or bready.
Olive Oil or Avocado Oil (2 tablespoons)
Supports browning and crisp texture while keeping fats keto-appropriate.
Salt (½ teaspoon)
Enhances all flavors — adjust to taste depending on how salty your cheese is.
Black Pepper (¼ teaspoon)
Adds gentle heat and depth without overpowering.
Optional: Paprika or Chili Flakes (¼ teaspoon)
For subtle warmth and complexity.
Step-by-Step Cooking Process
Step 1: Preparing the Mushrooms Properly
Start by cleaning the mushrooms gently with a damp cloth or paper towel. Avoid rinsing them under running water — mushrooms absorb moisture quickly, which prevents crisping later. Once cleaned, pat them completely dry. This step cannot be rushed. Dry mushrooms equal crispy results.
Step 2: Setting Up the Coating
In a large bowl, whisk the egg until smooth. In a separate bowl, mix almond flour, parmesan cheese, garlic powder, salt, pepper, and any optional spices. This dry mixture should look evenly blended and slightly coarse.

Step 3: Coating the Mushrooms
Dip each mushroom into the egg mixture, letting excess drip off, then roll it gently in the almond flour mixture until evenly coated. Work in batches and avoid pressing the coating on — light contact is enough.
Step 4: Preparing for Cooking
Arrange the coated mushrooms in a single layer on a lined baking sheet or preheated skillet. Leave space between each one so heat can circulate and crisp the exterior properly.

Step 5: Cooking Until Golden and Crispy
Once the mushrooms are arranged in a single layer, drizzle or lightly brush them with olive oil or avocado oil. This final touch helps the coating brown evenly and develop that crisp exterior. Cook in a preheated oven or skillet, turning once halfway through, until the mushrooms are deeply golden on all sides. You’ll notice the coating firm up while the mushrooms stay juicy inside — that contrast is exactly what you’re aiming for.
If baking, resist the urge to overcrowd the pan or rush the timing. Crispiness comes from dry heat and airflow. If pan-frying, keep the heat at medium to medium-high and give the mushrooms space so they sear rather than steam.
Step 6: Finishing With Fresh Garlic Aroma
During the last minute of cooking, scatter the minced fresh garlic over the mushrooms. This timing is important. Adding garlic too early can cause bitterness; adding it at the end lets it bloom in the heat, releasing aroma without burning. Gently toss or flip once to coat the mushrooms in that fragrant garlic oil.
Step 7: Resting Briefly for Best Texture
Remove the mushrooms from the heat and let them rest for a minute or two before serving. This brief pause allows the coating to set and stay crisp when picked up. Serve warm for the best texture and flavor.
Health & Nutrition Insights
These Keto Crispy Garlic Mushroom Bites fit beautifully into a low-carb lifestyle. Mushrooms are naturally low in carbohydrates and provide fiber, antioxidants, and micronutrients without adding heaviness. When paired with healthy fats from olive oil and protein-rich parmesan, they become far more satisfying than traditional carb-heavy snacks.
Because this recipe avoids refined flours and sugars, it helps keep blood sugar stable while still delivering crunch and flavor. It’s an excellent option for anyone looking to reduce snacking on processed foods without feeling deprived.
Serving & Pairing Ideas
Serve these mushroom bites hot and fresh as a keto appetizer, game-day snack, or party platter. They pair well with a simple garlic aioli, herbed yogurt dip, or sugar-free marinara for dipping.
They also work surprisingly well as a side dish for grilled chicken, steak, or roasted vegetables. For something different, sprinkle them over a crisp salad to add texture and savory depth.
Storage & Meal Prep Tips
These mushroom bites are best enjoyed fresh, but leftovers can be stored in an airtight container in the refrigerator for up to 3 days. Reheat them in a hot oven or skillet to bring back crispiness. Avoid microwaving, as it softens the coating.
For meal prep, you can clean and dry the mushrooms and mix the dry coating ingredients ahead of time, storing them separately until ready to cook.
Frequently Asked Questions
Can I make these dairy-free?
Yes. Replace parmesan with nutritional yeast. The flavor will be slightly different, but still savory.
Why aren’t my mushrooms crispy?
Excess moisture or overcrowding the pan are the most common reasons. Always dry mushrooms thoroughly and cook in a single layer.
Can I use coconut flour instead of almond flour?
Coconut flour is not recommended here, as it absorbs too much moisture and creates a dense coating.
Can I air-fry these?
Yes. Air frying works very well and produces excellent crispiness with less oil.
Kitchen Tips & Troubleshooting
• Always dry mushrooms thoroughly
• Don’t overcrowd the pan
• Add fresh garlic near the end
• Let mushrooms rest briefly before serving
• Use medium heat to avoid burning
Nutrition Breakdown (Per Serving)
Calories: ~180
Protein: ~8 g
Fat: ~14 g
Total Carbs: ~6 g
Net Carbs: ~3 g
(Values are approximate and depend on specific ingredients.)
Recipe Details
Prep Time: 15 minutes
Cook Time: 20 minutes
Total Time: 35 minutes
Course: Appetizer / Snack
Cuisine: Keto / Low-Carb
Servings: 4
Calories: ~180 per serving
Closing Note
Sometimes the most satisfying recipes are the ones that turn simple ingredients into something unforgettable. These mushroom bites prove that low-carb eating can still be crunchy, comforting, and full of flavor — one crisp bite at a time.
Keto Crispy Garlic Mushroom Bites Recipe
Ingredients
Method
- Start by cleaning the mushrooms gently using a damp cloth or paper towel to remove any dirt. Avoid rinsing them under running water, as mushrooms absorb moisture very quickly. Once clean, pat them completely dry with paper towels. Take your time with this step — the drier the mushrooms, the crispier the final result.
- Crack the egg into a bowl and whisk it thoroughly until the yolk and white are fully combined and the mixture looks smooth and slightly frothy. This egg wash helps the coating stick evenly without becoming heavy.
- In a separate bowl, combine the almond flour, grated parmesan, garlic powder, salt, and pepper. Stir well so the seasonings are evenly distributed throughout the mixture. The texture should look slightly coarse but uniform, which helps create a light, crispy coating.
- Working in batches, dip each mushroom into the egg mixture, allowing any excess to drip off. Then gently roll the mushroom in the almond flour mixture until it’s lightly and evenly coated. Avoid pressing the coating on — a light touch keeps the exterior crisp rather than dense.
- Arrange the coated mushrooms in a single layer on a baking sheet or in a preheated skillet, making sure there is space between each one. Drizzle or brush them lightly with oil to encourage even browning and crisping during cooking.
- Cook the mushrooms until they are golden and crispy on the outside, turning them once about halfway through so all sides brown evenly. Keep the heat at medium to medium-high so they crisp without burning or steaming.
- During the final minute of cooking, sprinkle the minced fresh garlic over the mushrooms and gently toss or flip them once. This timing allows the garlic to release its aroma without burning, adding a fresh, savory finish.
- Remove the mushrooms from the heat and let them rest for a minute or two before serving. This brief rest helps the coating set, keeping the mushrooms crisp and easy to pick up when serving.
Leave a Reply