Warm Introduction
Some desserts feel like a celebration, while others feel like a quiet moment of relief — and this No-Bake Keto Coconut Yogurt Cheesecake is very much the second kind. I first made it on one of those days when the craving for something sweet hit hard, but the thought of turning on the oven felt exhausting. It was warm, my energy was low, and I wanted a dessert that felt cooling, light, and comforting without undoing a full day of mindful eating.
The moment I tasted it, I knew it was special. The creaminess was unmistakably cheesecake-like, but lighter. The coconut yogurt added a subtle tang and freshness that balanced the richness beautifully. It didn’t taste like a “keto workaround” or a compromise — it tasted intentional, calm, and indulgent in a clean way.
For anyone following a keto or low-carb lifestyle, desserts can be emotionally tricky. This No-Bake Keto Coconut Yogurt Cheesecake offers a way to enjoy sweetness without spikes, heaviness, or regret. It’s the kind of dessert you can savor slowly, knowing it supports your goals instead of fighting them.
What Makes This No-Bake Keto Coconut Yogurt Cheesecake Stand Out
What truly sets this cheesecake apart is how gentle it feels. Many low-carb desserts rely heavily on cream cheese and sweeteners, which can feel dense after a few bites. This recipe uses coconut yogurt as a key element, creating a lighter texture that still delivers richness but doesn’t overwhelm.
Another standout feature is the no-bake factor. There’s no oven, no water bath, and no worrying about cracks or overbaking. Everything comes together in a bowl, sets beautifully in the refrigerator, and slices cleanly once chilled. That simplicity makes it approachable even for readers who don’t consider themselves confident bakers.
From a dietary perspective, this dessert fits seamlessly into keto and low-carb eating. It’s sugar-free, low in net carbs, and rich in healthy fats that promote satiety. Instead of triggering more cravings, it actually feels satisfying — the kind of dessert that closes the eating window rather than reopening it.
Personal Blogger Note
I’ve made this cheesecake more times than I expected to. It started as an experiment, but quickly became my go-to dessert when I wanted something cooling and comforting at the end of the day. There’s something about the coconut flavor paired with that creamy texture that feels soothing, almost grounding.
I remember serving it once after dinner and thinking I’d only have a small slice. But it was so balanced — not overly sweet, not too heavy — that it felt easy to enjoy without feeling like I needed more. That’s rare for desserts, especially low-carb ones.
What I love most is how versatile it is. I’ve served it plain, topped it with berries, and even enjoyed it straight from the fridge when I didn’t feel like slicing. Every time, it feels like a thoughtful choice rather than a cheat.
Kitchen Equipment You’ll Need (And Why It Matters)
Mixing Bowl
A large mixing bowl gives you enough space to blend everything smoothly without splashing or overworking the mixture. Cheesecake filling benefits from gentle, even mixing.
Hand Mixer or Whisk
A hand mixer makes the process quicker and ensures a silky texture, but a whisk works just fine if you prefer a slower, more hands-on approach.
Spatula
A spatula is essential for scraping down the sides of the bowl so everything blends evenly and no pockets of cream cheese remain.
Springform Pan or Dish
A removable-side pan makes slicing and serving easier, especially once the cheesecake is fully set. A standard dish works too if you’re serving it casually.
Measuring Cups and Spoons
Accurate measurements matter here — especially for sweetener and fat balance — to achieve the right texture and flavor.
Ingredients With Purpose and Smart Substitutions
Cream Cheese
Cream cheese provides structure and richness, giving the cheesecake its classic body and smooth mouthfeel.
Substitution:
For a lighter texture, part of the cream cheese can be replaced with mascarpone, though it will slightly soften the set.
Coconut Yogurt
This is the star ingredient. It adds tang, lightness, and a subtle coconut flavor that keeps the dessert from feeling heavy.
Substitution:
Greek yogurt can be used for a less coconut-forward version, though coconut yogurt keeps it dairy-lighter in feel.
Low-Carb Sweetener
Sweetener balances the tang and brings dessert-level sweetness without sugar.
Substitution:
Any powdered keto-friendly sweetener works best for smooth texture.
Coconut Oil or Butter
This helps the cheesecake set properly while adding richness.
Substitution:
Butter provides a more classic cheesecake flavor, while coconut oil enhances coconut notes.
Vanilla Extract
Vanilla adds warmth and rounds out flavors, making the cheesecake taste more complete.
Step-by-Step Cooking Process
Step 1: Preparing the Pan
Lightly grease your pan or line it with parchment paper. This small step makes removal much easier once the cheesecake is set and ready to serve.

Step 2: Softening the Cream Cheese
Allow the cream cheese to come to room temperature before mixing. This ensures a smooth, lump-free filling and prevents overmixing later.
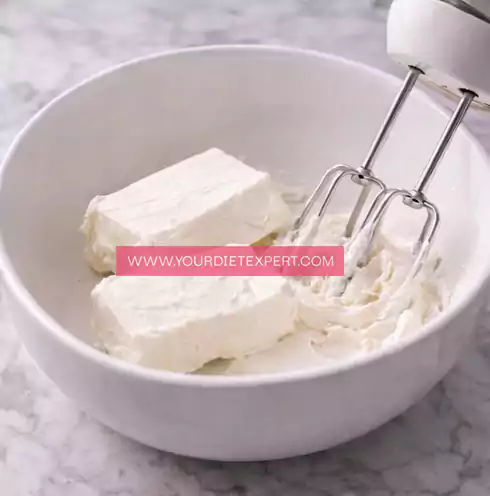
Step 3: Mixing the Base
In a large bowl, combine the softened cream cheese and coconut yogurt. Mix gently until smooth and cohesive, scraping down the sides as needed.

Step 4: Sweetening and Flavoring the Filling
Once the cream cheese and coconut yogurt are fully smooth, add the powdered low-carb sweetener and vanilla extract. Mix gently, just until the sweetness is evenly distributed. This is the stage where the cheesecake starts to smell and taste like a dessert rather than a mixture. Take a small taste and adjust sweetness if needed — remember that flavors mellow slightly once chilled, so aim for balanced rather than overly sweet.
Step 5: Adding the Setting Fat
Slowly drizzle in the melted coconut oil or softened butter while mixing on low speed. This step is essential for structure. The fat helps the cheesecake firm up as it chills, giving you clean slices without the need for baking or gelatin. Mix only until incorporated; overmixing can introduce air, which affects the final texture.
Step 6: Pouring and Smoothing
Pour the cheesecake mixture into the prepared pan. Use a spatula to smooth the top gently, pushing the mixture into the corners and evening out the surface. Lightly tap the pan on the counter to release any trapped air bubbles, then smooth the top one last time for a clean finish.
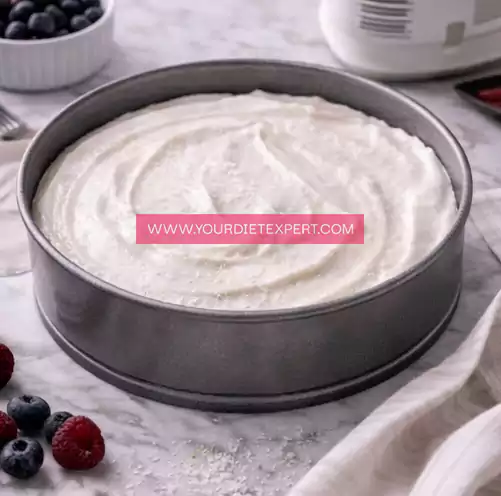
Step 7: Chilling to Set
Place the pan into the refrigerator and allow the cheesecake to chill undisturbed until fully set. This resting time is where the magic happens — the flavors meld, the texture firms, and the cheesecake becomes sliceable while staying creamy. Avoid checking too early; patience here rewards you with the best consistency.
Health & Nutrition Insights
This No-Bake Keto Coconut Yogurt Cheesecake works beautifully for low-carb and keto lifestyles because it emphasizes healthy fats over sugars. The fats from cream cheese, coconut yogurt, and coconut oil slow digestion and promote satiety, helping prevent blood sugar spikes and post-dessert cravings.
Coconut yogurt adds a lighter feel compared to traditional heavy cheesecake fillings while still contributing beneficial fats and a gentle tang. Unlike baked cheesecakes that can feel dense and heavy, this version feels cooling and balanced, making it easier to enjoy in moderation.
For those managing insulin resistance, sugar cravings, or simply aiming for more mindful desserts, this cheesecake offers satisfaction without the crash — a rare but valuable combination.
Serving and Pairing Ideas
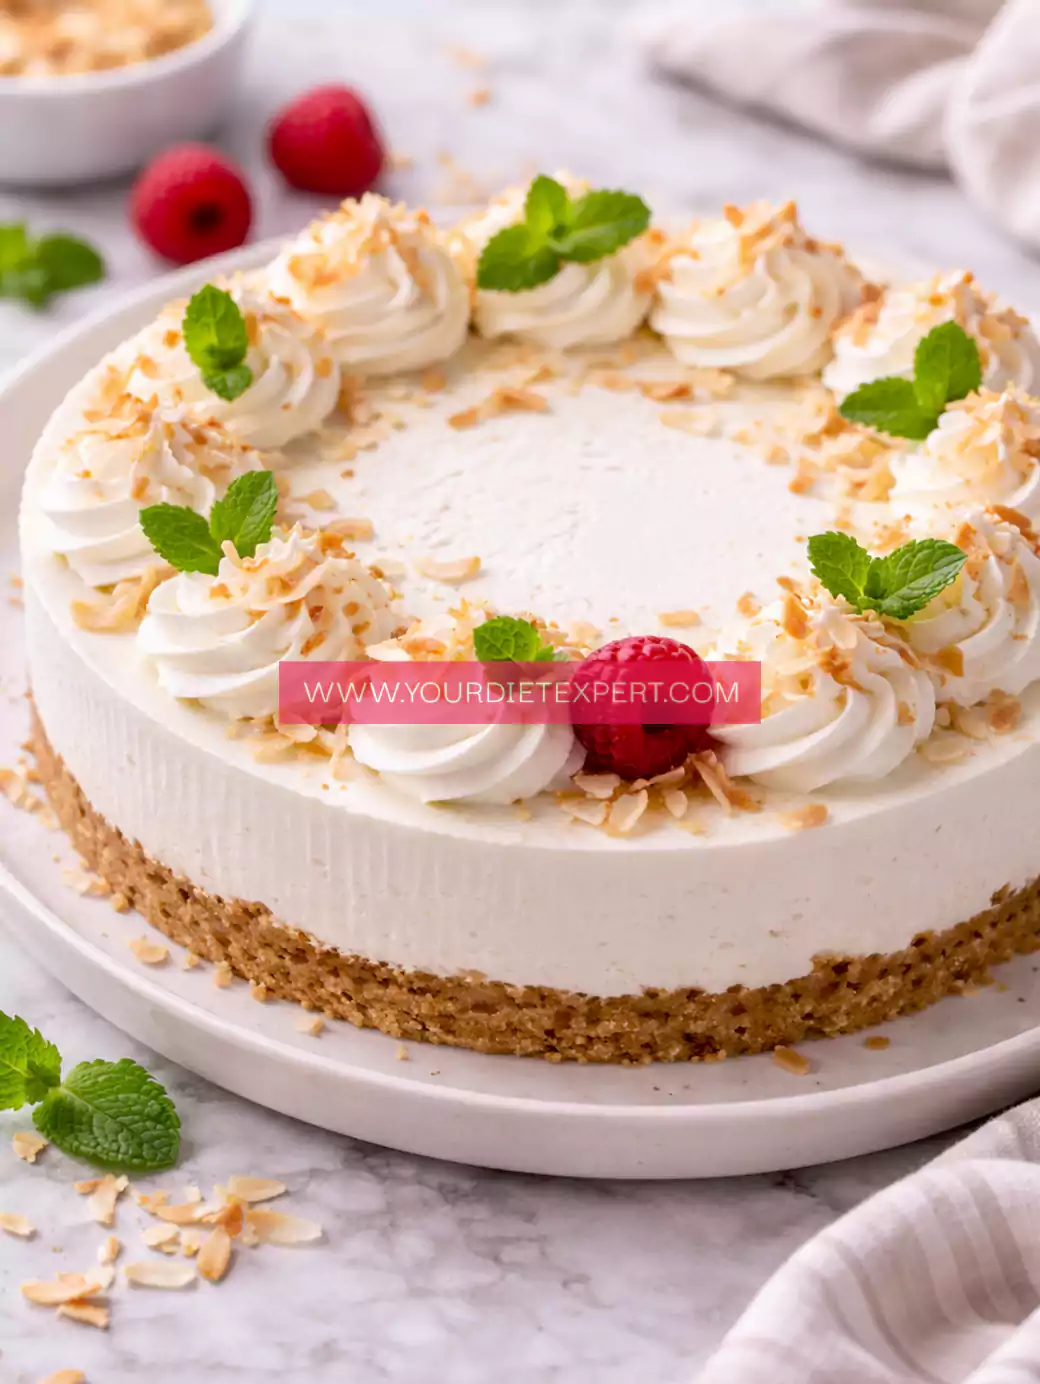
This cheesecake shines when served chilled and simply sliced. For an elegant touch, garnish with a few fresh berries, a sprinkle of toasted coconut, or a light drizzle of sugar-free chocolate sauce. These additions enhance presentation without overwhelming the base flavor.
It works well as a dinner-party dessert because it can be made entirely ahead of time. It’s also perfect for warm weather when baked desserts feel too heavy. Pair it with herbal tea, black coffee, or sparkling water for a refreshing finish.
Storage & Meal Prep Tips
Store the cheesecake covered in the refrigerator. It holds its texture well for several days and often tastes even better after the first night as flavors settle.
For longer storage, individual slices can be frozen and thawed slowly in the refrigerator. The texture remains creamy, though slightly firmer when fully chilled. Avoid microwaving to thaw, as this can affect consistency.
Frequently Asked Questions
Can I make this cheesecake dairy-free?
Yes. Use dairy-free cream cheese and coconut yogurt. The flavor will be slightly more coconut-forward but still delicious.
Will this cheesecake hold its shape without baking?
Yes, as long as it chills fully. The combination of fat and refrigeration provides structure without gelatin or baking.
Is coconut yogurt keto-friendly?
When unsweetened and used in moderation, coconut yogurt fits well into a keto approach.
Can I add a crust?
Yes. A simple almond flour and butter crust works well, but the cheesecake is just as enjoyable crustless.
Kitchen Tips & Troubleshooting
If your cheesecake feels too soft after chilling, it likely needs more time or slightly more fat. If it feels too firm, allow it to sit at room temperature for a few minutes before slicing.
Always use powdered sweetener rather than granulated to avoid graininess. And make sure the cream cheese is fully softened before mixing — this prevents lumps and ensures a smooth texture.
Nutrition Breakdown (Per Serving)
- Calories: ~310
- Protein: ~6 g
- Fat: ~28 g
- Total Carbs: ~6 g
- Net Carbs: ~3 g
(Values are approximate and depend on ingredient choices.)
Recipe Details
- Prep Time: 15 minutes
- Cook Time: 0 minutes
- Total Time: 4 hours (includes chilling)
- Course: Dessert
- Cuisine: Keto / American
- Servings: 8
- Calories: ~310 per serving
Closing Note
Dessert doesn’t have to feel complicated or heavy to feel special. This cheesecake proves that simple, thoughtful ingredients can create something deeply satisfying — one chilled slice at a time.
No-Bake Keto Coconut Yogurt Cheesecake Recipe
Ingredients
Method
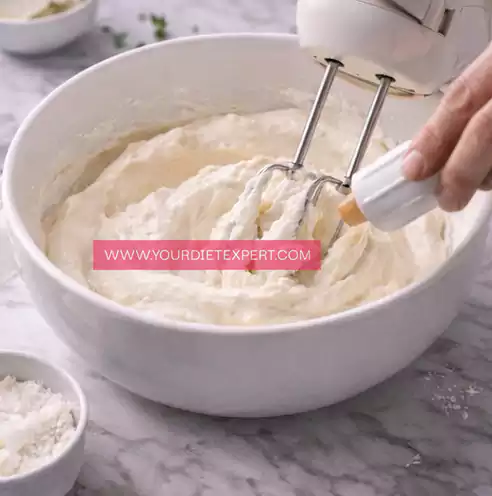
- Place the softened cream cheese and coconut yogurt into a large mixing bowl. Using a hand mixer on low speed or a sturdy whisk, mix them together slowly until the mixture becomes completely smooth and creamy. Take your time at this stage, scraping down the sides and bottom of the bowl as needed, to ensure there are no lumps left. A smooth base here is key to achieving a silky cheesecake texture later.
- Add the powdered low-carb sweetener and vanilla extract to the bowl. Mix gently until everything is evenly blended. Pause to taste the mixture and check the sweetness, keeping in mind that the flavors will mellow slightly once the cheesecake is chilled. Adjust sweetness if needed, but aim for a balanced, lightly sweet flavor rather than an overpowering one.
- With the mixer on low speed, slowly drizzle in the melted coconut oil or softened butter. Pouring it in gradually helps it blend smoothly into the mixture without separating. Continue mixing just until the fat is fully incorporated and the filling looks glossy and cohesive. Avoid overmixing, as too much air can affect how the cheesecake sets.
- Pour the finished cheesecake mixture into the prepared pan. Use a spatula to spread it evenly, gently pushing the filling into the edges and smoothing the top. Lightly tap the pan on the counter once or twice to release any trapped air bubbles, then smooth the surface again for a clean, even finish.
- Place the pan into the refrigerator and let the cheesecake chill undisturbed until fully set. This usually takes several hours, and allowing enough time is important for the best texture. Once firm, remove the cheesecake from the pan, slice into portions, and serve chilled for a creamy, refreshing, and perfectly set no-bake dessert.


Leave a Reply