There’s something deeply nostalgic about blueberry ice cream. For me, it brings back memories of warm summer afternoons, when the heat felt endless and all you wanted was something cold, creamy, and comforting. But as someone who shifted toward a healthier, low-carb lifestyle, traditional ice cream quickly became one of those “once-in-a-while” indulgences.
That’s exactly why this Easy Keto Blueberry Ice Cream (Low Carb, Sugar-Free Dessert) became such a special recipe in my kitchen. It wasn’t just about making a healthier version—it was about recreating that same joy, that same creamy satisfaction, without the sugar crash afterward. And surprisingly, this version doesn’t feel like a compromise at all.
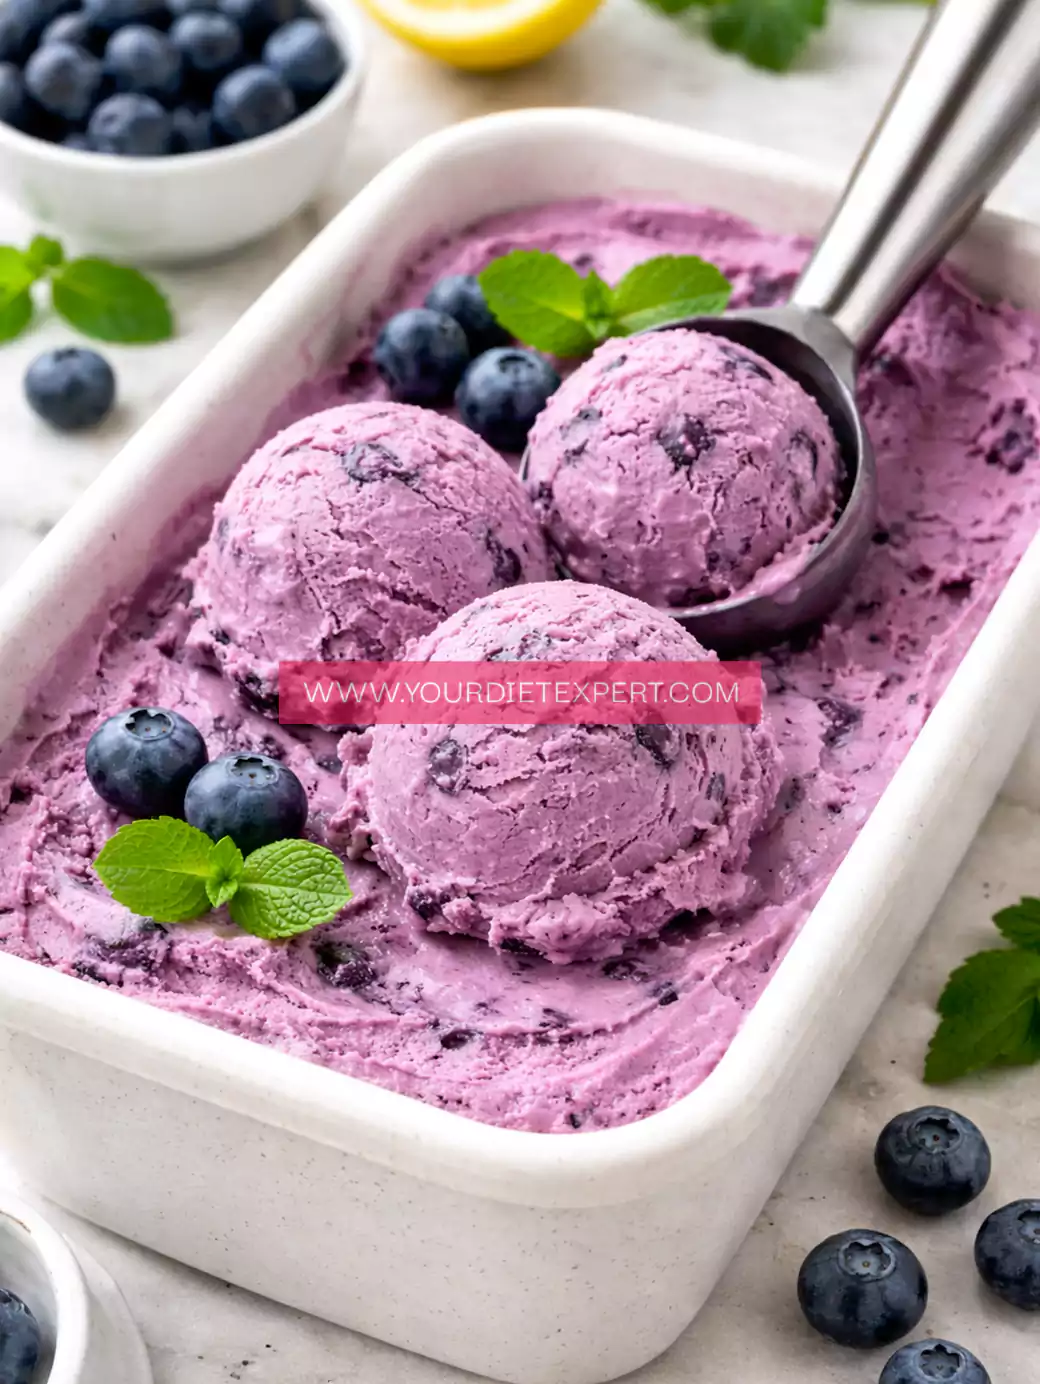
The first time I made it, I remember thinking, “This actually tastes like real ice cream.” Smooth, rich, slightly tangy from the blueberries, and just sweet enough. If you’re following keto, low-carb, or even just trying to eat cleaner, this recipe gives you that indulgent dessert experience—without the guilt.
What Makes This Keto Blueberry Ice Cream Stand Out
There are plenty of low-carb desserts out there, but this one has a few qualities that truly set it apart.
First, the texture. Many keto ice creams end up icy or overly dense. This recipe, however, creates a creamy, scoopable consistency—even without refined sugar. That’s because of the balance between cream, natural fats, and the right sweetener.
Secondly, the flavor is beautifully layered. Blueberries bring a natural sweetness and slight tartness that keeps the dessert from feeling too heavy. It’s refreshing but still indulgent.
Another thing I love is how simple it is. You don’t need complicated techniques or hours of prep. Whether you’re making it after dinner or prepping for the week, it fits easily into your routine.
And finally, it’s genuinely diet-friendly:
- Low carb and keto-approved
- Sugar-free and blood sugar stable
- High in healthy fats for sustained energy
- Naturally gluten-free
A Personal Blogger Note
I still remember making this after a long day when I was craving something sweet but didn’t want to undo my progress. I had some blueberries in the fridge, a bit of cream, and that familiar internal debate—“Should I just order dessert?”
Instead, I made this.
And honestly, it felt like a small win. Not just because it tasted good, but because it aligned with my goals. I didn’t feel sluggish afterward. I didn’t regret it. I just enjoyed it.
Since then, this has become one of those “quiet staples” in my routine. I make a batch, freeze it, and know it’s there whenever I need something comforting.
Kitchen Equipment You’ll Need (And Why It Matters)
Blender or Food Processor
This is essential for creating a smooth base. It helps break down blueberries and blend everything into a creamy mixture without lumps.
Mixing Bowl
Useful if you prefer mixing ingredients separately before blending. It also helps when folding in textures later.
Freezer-Safe Container
You’ll need a good container to freeze the ice cream. A shallow container works best because it allows even freezing.
Spatula
Helps scrape every bit of the mixture from the blender and ensures nothing goes to waste.
Hand Whisk (Optional)
If you’re whipping cream separately, this gives better control over texture.
Ingredients (With Substitutions and Why They Matter)
1 cup fresh or frozen blueberries
These provide natural flavor and color.
Substitution: Raspberries or strawberries work, but blueberries give a smoother texture.
1½ cups heavy cream
Creates richness and creamy texture.
Substitution: Coconut cream for a dairy-free option.
½ cup unsweetened Greek yogurt
Adds slight tanginess and improves texture.
Substitution: Coconut yogurt if dairy-free.
⅓ cup powdered erythritol (or keto sweetener)
Sweetens without raising blood sugar.
Substitution: Monk fruit or stevia blends.
1 teaspoon vanilla extract
Enhances flavor depth.
1 tablespoon lemon juice
Balances sweetness and brightens blueberry flavor.
Step-by-Step Cooking Process
Step 1: Prepare the Blueberries
If using fresh blueberries, rinse and dry them. If frozen, let them thaw slightly. This helps them blend more easily.
Step 2: Blend the Base
Add blueberries, yogurt, sweetener, vanilla, and lemon juice to your blender. Blend until smooth and vibrant in color.
Step 3: Add Cream
Pour in the heavy cream and blend again gently. Avoid over-blending at this stage—you want it creamy, not too airy.
Step 4: Taste and Adjust
This is important. Taste your mixture and adjust sweetness if needed. Keto sweeteners vary, so trust your preference.
Step 5: Transfer to Container
Pour the mixture into your freezer-safe container. Smooth the top with a spatula.
Step 6: Freeze Properly
Freeze for 3–4 hours. Stir once halfway through to prevent ice crystals.
Step 7: Scoop and Serve
Let it sit at room temperature for a few minutes before scooping for the best texture.
Health & Nutrition Insights of Keto Blueberry Ice Cream
This dessert isn’t just about taste—it’s designed to support your health goals.
The healthy fats from cream provide sustained energy, which is essential for keto diets. Instead of spikes and crashes, you get steady fuel.
Blueberries, even in small amounts, bring antioxidants. These help support overall wellness without significantly increasing carbs.
The absence of sugar makes it blood sugar friendly, which is beneficial for insulin control and weight management.
And because it’s satisfying, it helps reduce cravings—one of the biggest challenges in healthy eating.
Serving and Pairing Ideas
You can enjoy this ice cream in so many ways:
- With crushed nuts for crunch
- Alongside a keto brownie
- As a post-dinner dessert
- After a workout for a refreshing treat
For drinks, pair it with:
- Iced coffee
- Herbal tea
- Almond milk latte
Storage & Meal Prep Tips
Store in the freezer for up to 2 weeks.
For best results:
- Use an airtight container
- Place parchment on top to prevent ice crystals
- Let thaw slightly before scooping
Frequently Asked Questions
Can I make this without an ice cream maker?
Yes, this is a no-churn recipe, so no machine is needed.
Is this completely sugar-free?
Yes, as long as you use keto-approved sweeteners.
Why is my ice cream too hard?
This happens due to lack of sugar. Let it sit out before scooping.
Can I use frozen blueberries directly?
Yes, but thaw slightly for smoother blending.
Kitchen Tips & Troubleshooting
- Always taste before freezing
- Don’t over-blend cream
- Use powdered sweetener for smoother texture
- Stir halfway through freezing
Nutrition Breakdown (Per Serving)
- Calories: 220
- Protein: 4g
- Fat: 20g
- Carbs: 6g
- Net Carbs: 4g
Recipe Details
Prep Time: 10 minutes
Cook Time: 0 minutes
Total Time: 4 hours
Course: Dessert
Cuisine: Keto / Low-Carb
Servings: 4
Calories: 220
Closing Note
Sometimes, the best recipes are the ones that make healthy living feel effortless. This one does exactly that—simple, satisfying, and something you’ll keep coming back to.
Easy Keto Blueberry Ice Cream Recipe
Ingredients
Method
- Start by washing the blueberries very well under cold running water, gently rubbing them between your fingers to remove any dirt or residue. After washing, spread them out on a clean kitchen towel or paper towel and let them dry completely. This step is more important than it seems—any extra water can form ice crystals later and ruin the creamy texture of your ice cream.
- Once the blueberries are fully dry, add them into a blender along with the Greek yogurt, your chosen keto sweetener, vanilla extract, and lemon juice. Blend everything together until the mixture becomes completely smooth and creamy, with no visible chunks. Take a moment here to scrape down the sides of the blender if needed, so everything blends evenly and you get a consistent texture.
- Now pour in the heavy cream and blend again, but this time do it gently and briefly. You don’t want to over-blend at this stage because that can whip too much air into the mixture and affect the final texture. Just blend until the cream is fully combined and the mixture looks thick, silky, and uniform.
- Pause and taste the mixture before moving forward. This is your chance to adjust the sweetness exactly to your liking. If you prefer it sweeter, add a little more sweetener and blend again briefly. Keep in mind that flavors become slightly less sweet once frozen, so a slightly sweeter base is ideal.
- Carefully pour the mixture into a freezer-safe container. Use a spatula to scrape out every bit from the blender, then gently smooth the top so it freezes evenly. A flat surface helps prevent uneven freezing and makes scooping easier later.
- Place the container in the freezer and let it freeze for about 3 to 4 hours. About halfway through (around the 1.5–2 hour mark), take it out and give it a good stir using a spoon or fork. This step helps break up any ice crystals and keeps the texture creamy rather than icy.
- Once fully frozen, remove the ice cream from the freezer and let it sit at room temperature for 5–10 minutes before scooping. This softens it slightly, making it much easier to scoop and giving you that perfect, smooth, creamy consistency similar to traditional ice cream.


Leave a Reply