There are certain dinners that instantly feel like comfort food—but without weighing you down—and Keto Ranch Chicken Rollups (Low Carb, Creamy & Easy Dinner) is one of those rare recipes that hits every mark. I still remember the evening I first made this dish. It was one of those long, slightly exhausting days where you want something warm, satisfying, and indulgent… but you also don’t want to undo your healthy eating progress.
That’s where this recipe stepped in and completely changed the game.
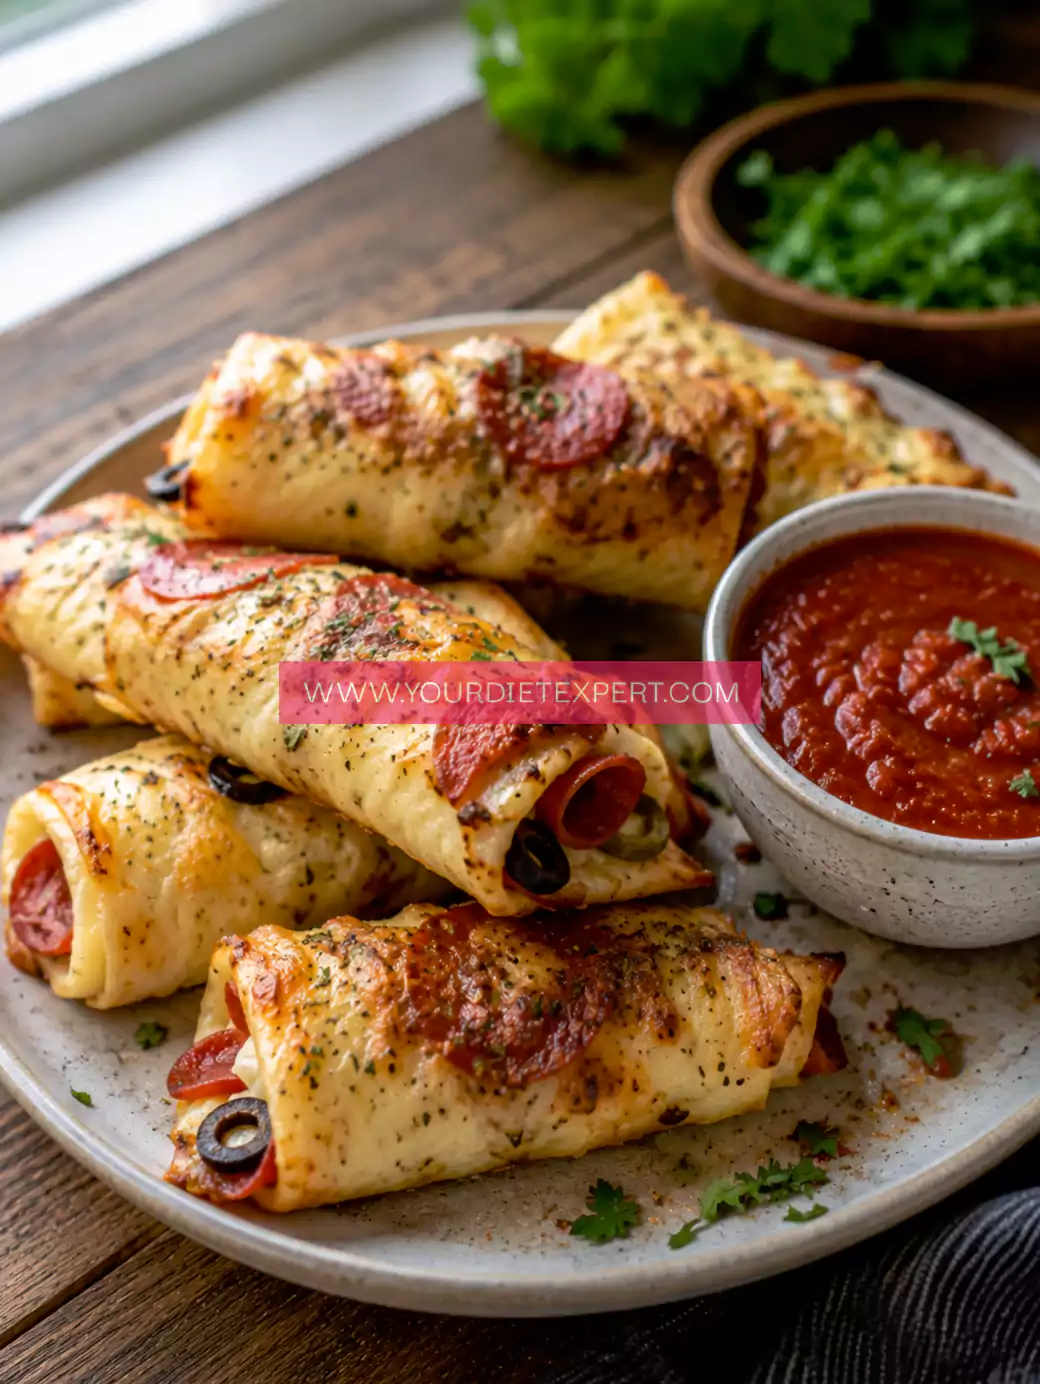
The creamy ranch flavor, tender chicken, and cheesy filling wrapped together in soft, golden rollups create a dish that feels indulgent, yet remains completely low-carb and keto-friendly. It’s the kind of meal that makes you forget you’re even “eating healthy”—and honestly, those are the best kinds of recipes to keep in your weekly rotation.
What Makes Keto Ranch Chicken Rollups Truly Stand Out
There are plenty of chicken recipes out there, but what makes these keto ranch chicken rollups special is the combination of simplicity, flavor, and nutritional balance.
First, the flavor profile is incredibly satisfying. The creamy ranch seasoning blends beautifully with melted cheese and juicy chicken, creating a rich, savory bite every time. It’s not overpowering—just perfectly balanced comfort.
Second, this is a time-saving dinner. Unlike complicated casseroles or multi-step recipes, these rollups come together quickly with minimal prep. You can easily make them on a busy weekday without feeling rushed or overwhelmed.
Finally, from a health perspective, this recipe checks all the boxes. It’s low in carbs, high in protein, and packed with healthy fats—making it ideal for keto, weight loss, or even just maintaining steady energy levels throughout the day.
A Personal Blogger Note
I’ve made these rollups more times than I can count, and every single time, they remind me why simple recipes often become the most loved.
The first time I tried them, I had just finished a strength workout and needed something high-protein but comforting. I didn’t want another plain grilled chicken plate—I needed something that felt like a reward. As the rollups baked, the smell of ranch seasoning and melted cheese filled the kitchen, and I knew I had stumbled onto something special.
Now, these have become one of my go-to meals when I want something reliable. Whether it’s a quiet dinner at home or a meal prep session for the week, they never disappoint. And the best part? Even people who aren’t keto absolutely love them.
Kitchen Equipment You’ll Need
When I first started making these, I realized that having the right tools makes the process smoother and more enjoyable. Here’s what you’ll need and why each one matters:
- Sharp Knife
You’ll use this to slice and prepare the chicken evenly. A sharp knife ensures clean cuts, which helps the rollups cook uniformly. - Cutting Board
A stable surface makes prep safer and more efficient. I prefer one with enough space to comfortably handle chicken without crowding. - Mixing Bowl
This is where the creamy ranch filling comes together. A medium-sized bowl works perfectly for combining everything without spilling. - Baking Dish
A slightly deep dish helps hold the rollups in place and keeps all that creamy goodness from spilling out during baking. - Toothpicks or Kitchen Twine
These help secure the rollups so they stay intact while cooking. - Spatula or Spoon
For mixing the filling and spreading it evenly over the chicken. - Oven
A properly preheated oven ensures even cooking and that golden, bubbly top.
Ingredients with Substitutions
Let’s break this down so you understand not just what to use—but why it matters.
- Chicken Breast (4 medium, thinly sliced)
The base of the rollups. Lean, high in protein, and perfect for wrapping.
Substitute: Chicken thighs for a juicier, slightly richer option. - Cream Cheese (200g, softened)
Adds creaminess and richness to the filling.
Substitute: Greek yogurt for a lighter, tangier version. - Shredded Cheese (1 cup)
Helps bind the filling and adds that gooey texture.
Substitute: Dairy-free cheese if needed. - Ranch Seasoning (1 tbsp)
The star flavor—herby, savory, and slightly tangy. - Garlic Powder (½ tsp)
Adds depth and enhances the overall flavor. - Salt & Pepper (to taste)
Essential for balancing flavors. - Olive Oil (1 tbsp)
Helps keep the chicken moist while baking.
Step-by-Step Cooking Process
Step 1: Prepare the Chicken
Start by slicing your chicken breasts into thin, even pieces. If they’re too thick, gently pound them down so they’re easier to roll. This step is key for even cooking.
Step 2: Make the Creamy Ranch Filling
In a mixing bowl, combine cream cheese, shredded cheese, ranch seasoning, garlic powder, salt, and pepper. Mix until smooth and well combined.
Step 3: Spread the Filling
Lay each piece of chicken flat and spread a generous layer of the creamy mixture over it. Don’t overload it, but make sure each bite will have flavor.
Step 4: Roll and Secure
Carefully roll up each piece of chicken and secure it with a toothpick. Try to keep them tight so they hold their shape.
Step 5: Arrange in Baking Dish
Place the rollups seam-side down in your baking dish. Drizzle lightly with olive oil to keep them moist.
Step 6: Bake to Perfection
Bake at 180°C (350°F) for 25–30 minutes, or until the chicken is fully cooked and the tops are golden and slightly bubbly.
Step 7: Rest and Serve
Let them rest for a few minutes before serving so the filling sets slightly and doesn’t spill out.
Health & Nutrition Insights of Keto Ranch Chicken Rollups
These rollups aren’t just delicious—they’re designed for performance and satiety.
- High Protein: Supports muscle repair and keeps you full longer
- Low Carb: Helps maintain ketosis and stable blood sugar levels
- Healthy Fats: Provide sustained energy without crashes
- Gluten-Free: Suitable for those with sensitivities
This makes them perfect for anyone following keto, low-carb, or weight-loss-focused diets.
Serving & Pairing Ideas
These rollups are incredibly versatile. You can serve them with:
- Steamed vegetables like broccoli or green beans
- Cauliflower mash for a comforting side
- A fresh salad with olive oil dressing
- Zucchini noodles for a low-carb pasta alternative
They also work beautifully for meal prep lunches or quick dinners.
Storage & Meal Prep Tips
- Refrigerator: Store in an airtight container for up to 4 days
- Freezer: Freeze individually for easy portion control
- Reheating: Warm in oven for best texture or microwave for convenience
Meal prepping these ahead of time can save you during busy weeks.
FAQs
Can I make these dairy-free?
Yes, substitute cream cheese and shredded cheese with dairy-free alternatives, though texture may vary slightly.
Can I prepare these ahead of time?
Absolutely. Assemble them and store in the fridge, then bake when ready.
How do I know when chicken is cooked?
The internal temperature should reach 75°C (165°F).
Can I air fry these instead?
Yes, cook at 180°C for about 15–18 minutes, checking for doneness.
Kitchen Tips & Troubleshooting
- If your chicken is too thick, it won’t roll properly—slice thinner
- Don’t overfill, or the filling may leak out
- Let them rest before serving to keep the structure intact
- Use evenly sized pieces for consistent cooking
Nutrition Breakdown (Per Serving)
- Calories: 320
- Protein: 28g
- Fat: 22g
- Carbs: 4g
- Net Carbs: 2g
Recipe Details
- Prep Time: 15 minutes
- Cook Time: 30 minutes
- Total Time: 45 minutes
- Course: Dinner
- Cuisine: Keto / Low Carb
- Servings: 4
- Calories: 320
Closing Note
These keto ranch chicken rollups are the kind of recipe that makes healthy eating feel effortless and enjoyable. Once you try them, they’ll quickly become a regular part of your routine.

Keto Ranch Chicken Rollups Recipe
Ingredients
Method
- Preheat your oven to 180°C (350°F) and give it enough time to fully heat up before you place anything inside—this helps the chicken cook evenly from the start. While the oven is heating, lightly grease your baking dish with a small amount of oil or butter, spreading it across the base and sides so nothing sticks and the rollups release easily after baking.
- Take your chicken breasts and slice them horizontally into thinner, even fillets. If any pieces are still thick, place them between two sheets of parchment paper and gently pound them with a rolling pin or the back of a heavy utensil until they are uniform in thickness. This step is important because evenly sized pieces cook at the same rate and are much easier to roll without tearing.
- In a mixing bowl, add the softened cream cheese, shredded cheese, ranch seasoning, garlic powder, salt, and pepper. Use a spoon or spatula to mix everything together thoroughly until the mixture becomes smooth, creamy, and well combined. Make sure there are no lumps of cream cheese left, as a smooth filling spreads more evenly and gives a better texture inside the rollups.
- Lay each piece of chicken flat on your work surface and spread a generous but even layer of the creamy mixture over it. Use the back of a spoon or spatula to gently spread it all the way to the edges, but avoid adding too much filling, as overfilling can cause it to spill out while baking.
- Starting from one end, carefully roll each chicken piece tightly into a log shape, keeping the filling inside as much as possible. Once rolled, secure each piece with one or two toothpicks to help it hold its shape during cooking. Try to keep the rolls snug but not overly tight, so they cook evenly.
- Place each rollup seam-side down in your prepared baking dish, spacing them slightly apart so heat can circulate around them. Once all the rollups are arranged, drizzle a small amount of olive oil over the top of each one—this helps keep the chicken moist and encourages a light golden color as they bake.
- Transfer the dish to the center rack of your preheated oven and bake for about 25–30 minutes. Check them toward the end of the cooking time—the chicken should be fully cooked through, and the tops should look lightly golden with some bubbling from the cheese filling. If needed, you can bake for an extra few minutes to achieve a slightly more golden finish.
- Once done, remove the baking dish from the oven and let the rollups rest for about 5 minutes before serving. This resting time allows the filling to settle and thicken slightly, making the rollups easier to handle and preventing the creamy center from spilling out when you cut into them.

Leave a Reply